- 25 Sep 2024
- 2 Minutes to read
- DarkLight
Roles
- Updated on 25 Sep 2024
- 2 Minutes to read
- DarkLight
OWL Software Edition Module or Feature Available In
Whooster
Standard
Advanced
Enterprise
Enterprise Plus
Enterprise Advanced
Smart City
Setting up user roles within the OWL platform is foundational to establishing robust access management and ensuring comprehensive security measures. User roles serve as a cornerstone in defining and managing the scope of access, permissions, and responsibilities that different individuals or groups of users possess within the system. Each user role in OWL is associated with a set of granular permissions that dictate what actions users can perform and what data they can access. For instance, roles may include permissions such as read-only access, editing capabilities, administrative privileges, or restricted access to sensitive information. Granular permissions allow administrators to tailor access controls precisely to meet operational requirements while safeguarding confidential data and maintaining compliance with regulatory standards. In conclusion, setting up user roles in the OWL platform is not merely about assigning permissions; it’s about creating a structured framework that enhances access management, reinforces security measures, supports compliance initiatives, and promotes operational efficiency. By defining clear roles and responsibilities, your organization can optimize resource utilization, mitigate risks, and empower users to contribute effectively to organizational goals while maintaining a secure and compliant environment within OWL.
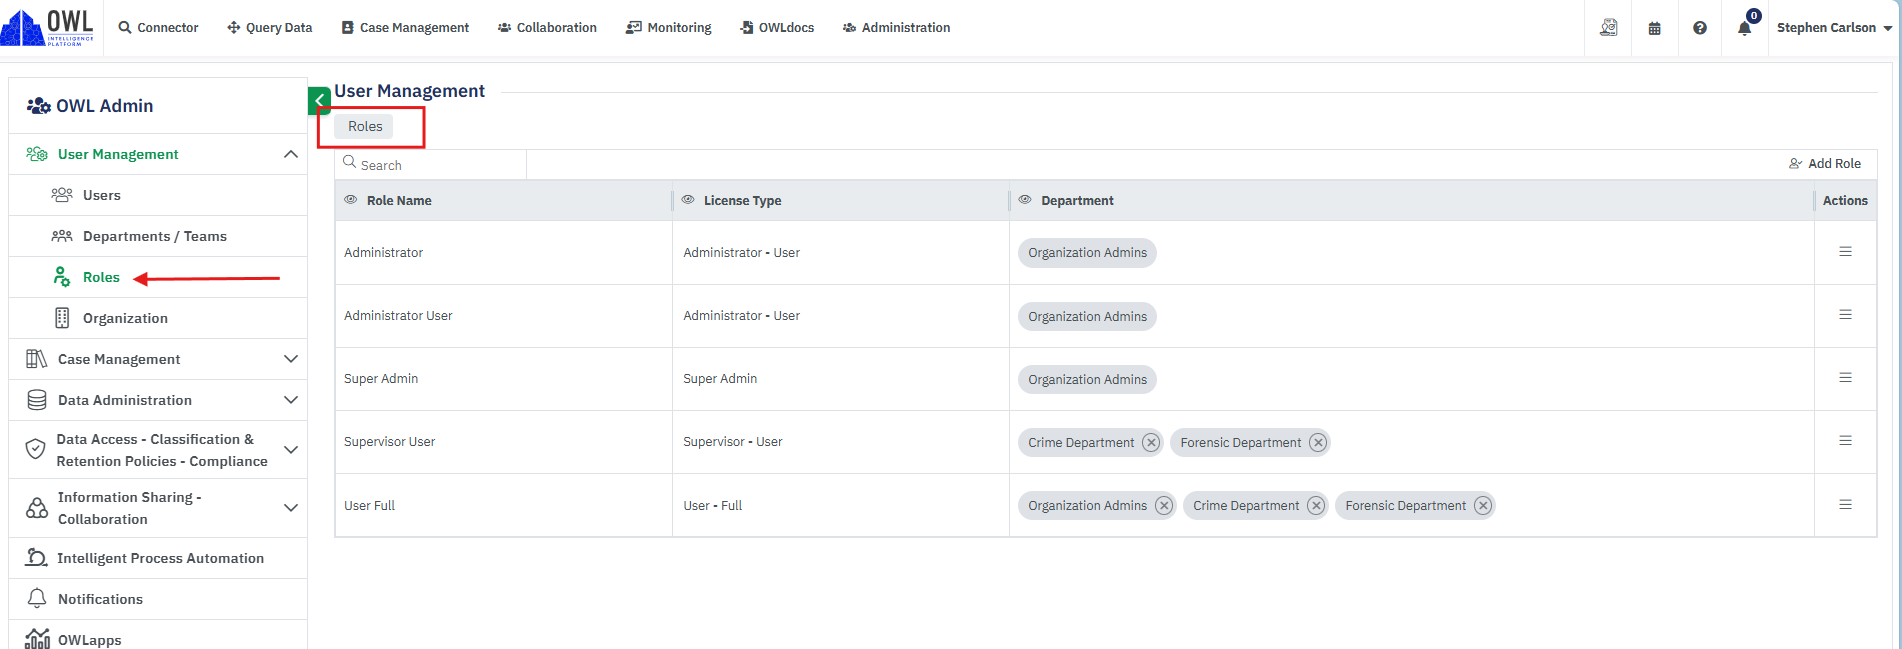
Steps to Access Roles:
Click Administration.
Click User Management.
Click Roles within the OWL Admin menu.
This will open the Roles page.

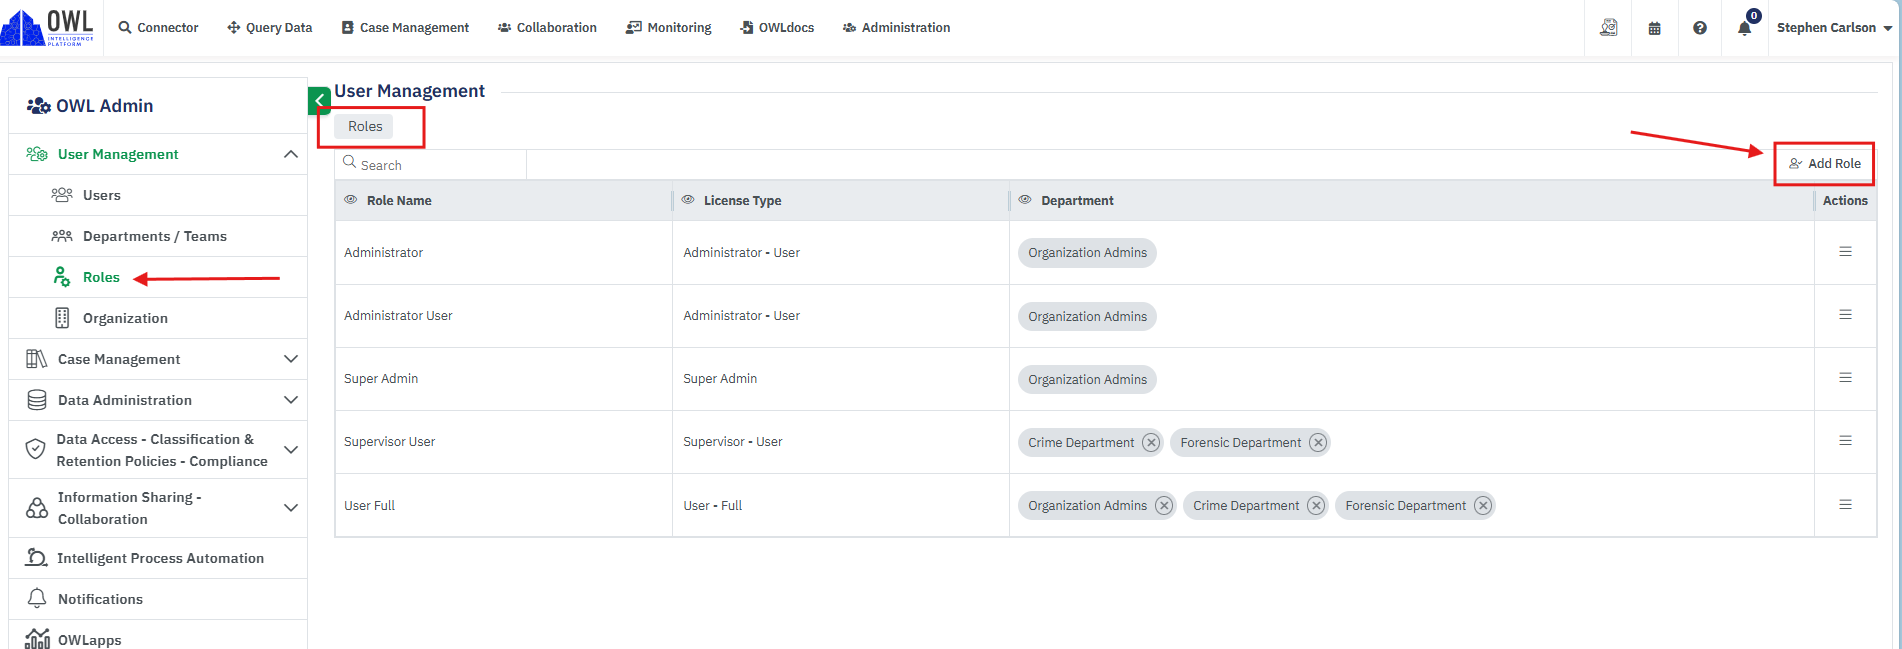
Steps to Add a Role:
Click Administration.
Click User Management.
Click Roles within the OWL Admin menu.
Click Add Role in the top right corner of the roles list.

The Add Role page has three fields; Role Name, License Type and Department.
Enter a unique role name in the Role Name field. This is a mandatory field.
Select available and appropriate license from the License Type dropdown. This is a mandatory field.

Based on license Type departments will be shown under the department field. As an example, if selecting any admin license type then only the Organization Admin department will be available in the dropdown.

Select the department and click the green Save button.

A role can be created with one license type and multiple departments.

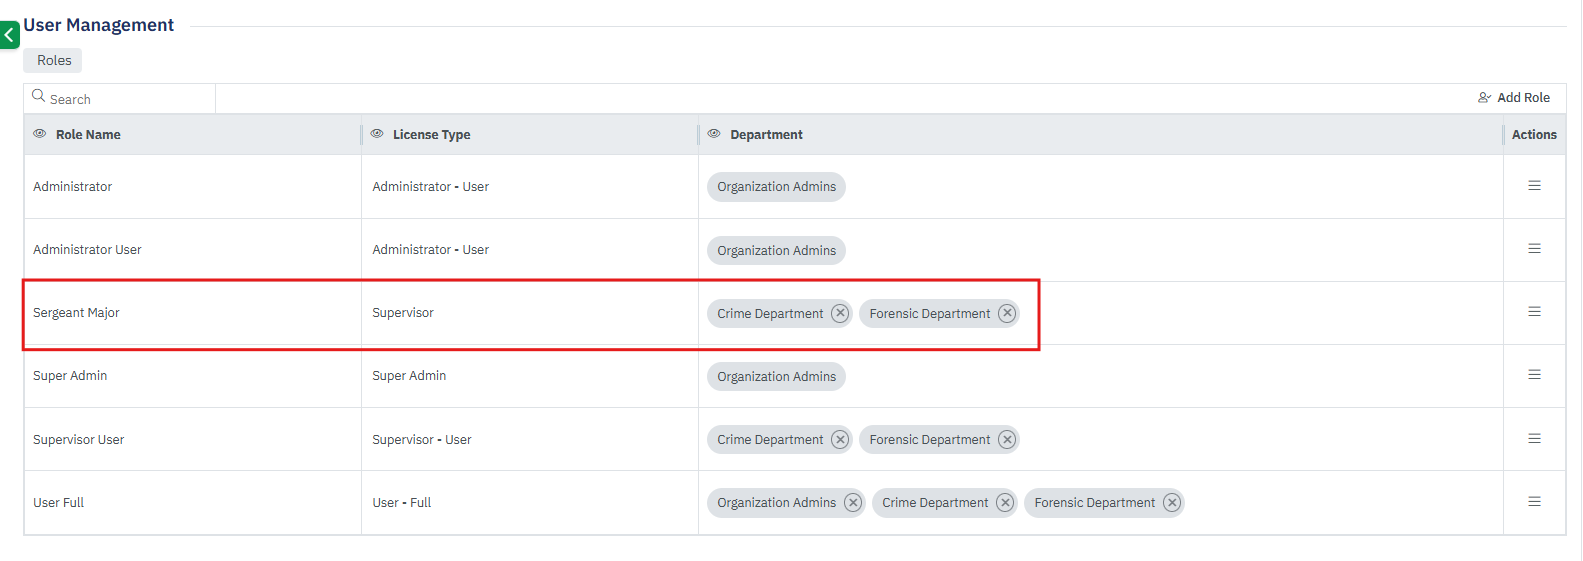
After clicking Save a new role will be created and can be viewed from the View Role page.

Viewing Roles:
View Roles page shows all the roles created under the organization.
Each created role will have a default license and department.
The user can search for any specific role using the wildcard search box from the Role page.

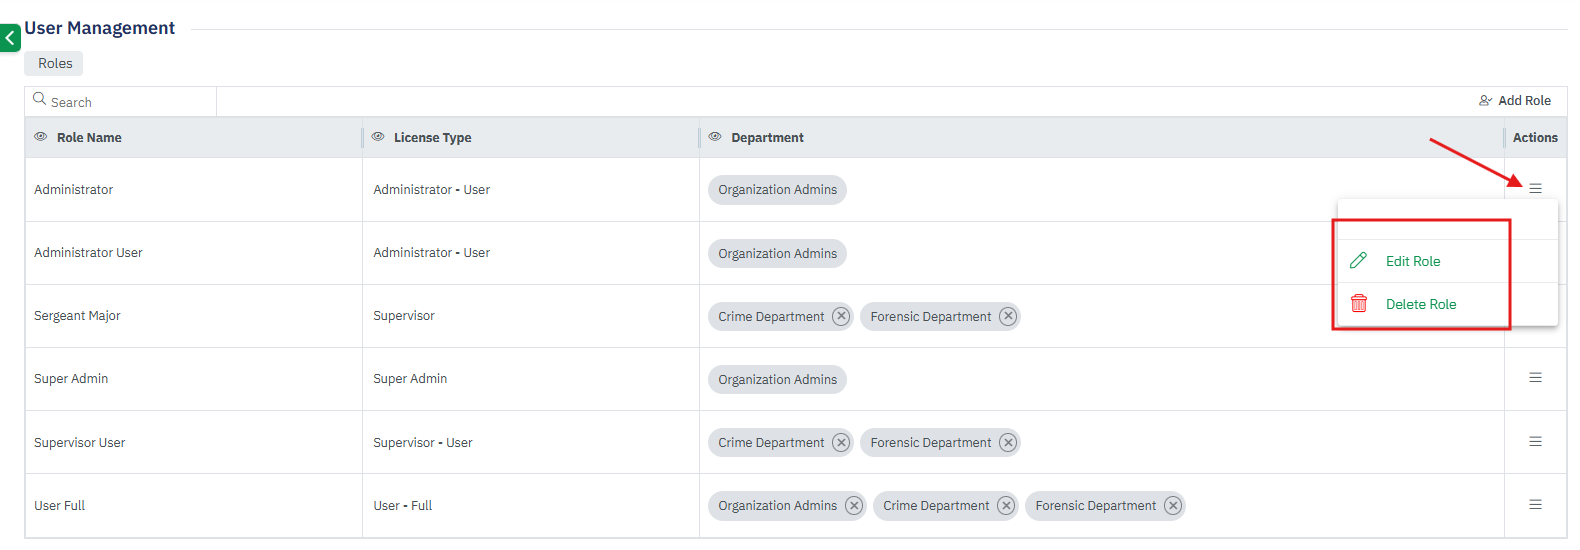
To perform different actions against each role, click menu under the Action column.

The Action menu has three options.
Edit Role: By clicking on this option, the Edit Role page is opened, where the user can modify the role name, License Type, and Department.
Delete Role: By clicking on this option the specific role will get deleted only if there are no active users already having this role in the organization.

