- 26 Sep 2024
- 1 Minute to read
- DarkLight
Retention Policies
- Updated on 26 Sep 2024
- 1 Minute to read
- DarkLight
OWL Software Edition Module or Feature Available In
Whooster
Standard
Advanced
Enterprise
Enterprise Plus
Enterprise Advanced
Smart City
Compliance with legal and regulatory requirements regarding data retention is a critical responsibility for organizations across various industries. OWLdocs, within the OWL platform, offers robust capabilities to assist organizations in setting and automating data retention policies effectively. This functionality not only ensures adherence to legal obligations but also optimizes data storage practices, leading to enhanced operational efficiency and reduced compliance risks.
Steps to Retention Policies:
Click Administration.
Click Data Access-Classification & Retention Policies-Compliance within the OWL Admin menu.
Click Retention Polices.
This will open the Retention Polices page.
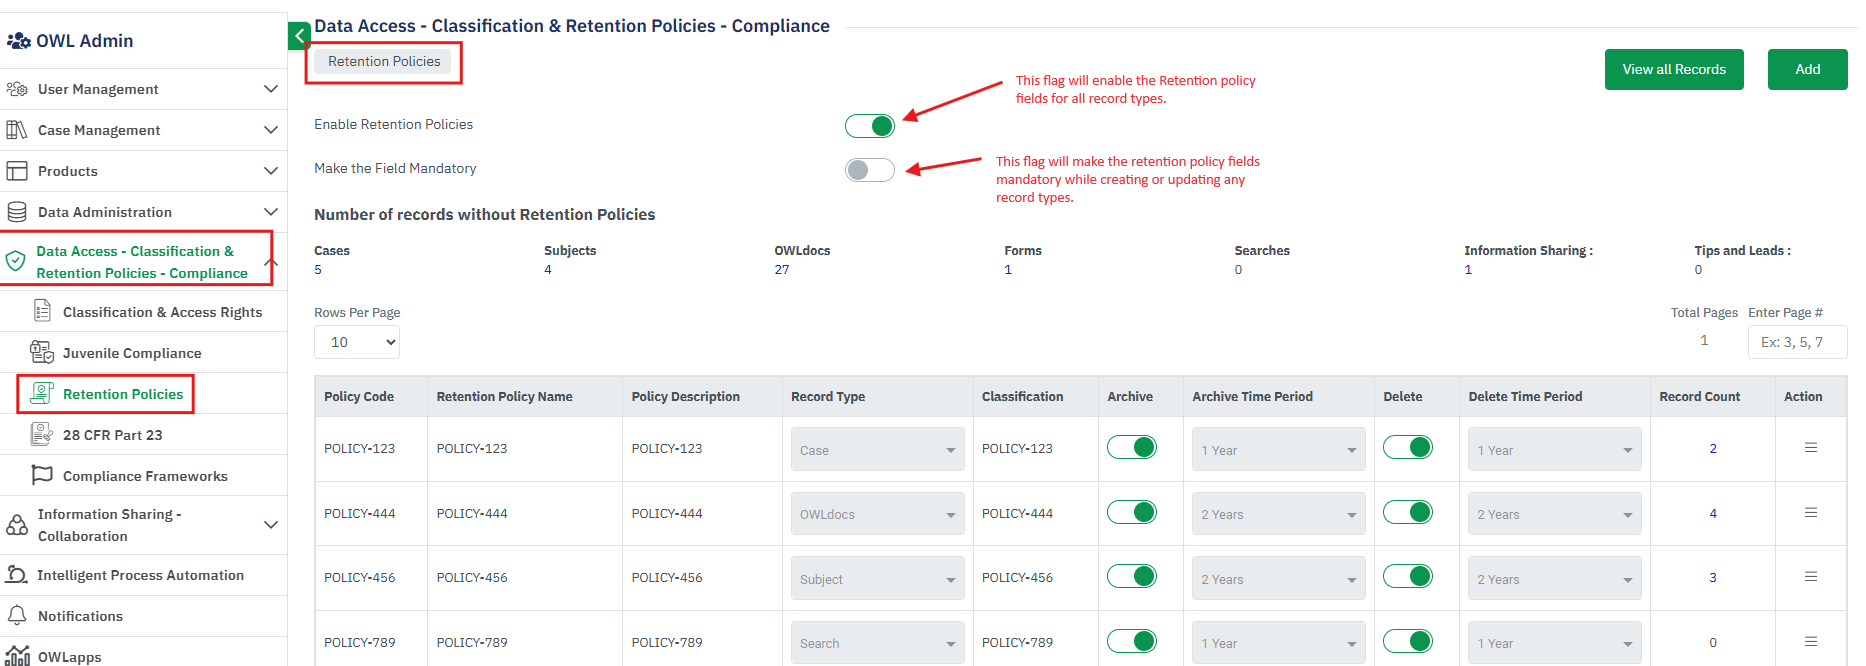
Enable the retention policy flag will show the retention fields under each record types.
Enabling the Mandatory flag will make the retention policy fields mandatory for all record types.
To create a new Retention policy, click on the “Add” button.
This will show a new row with editable fields in the table. The fields are shown below –
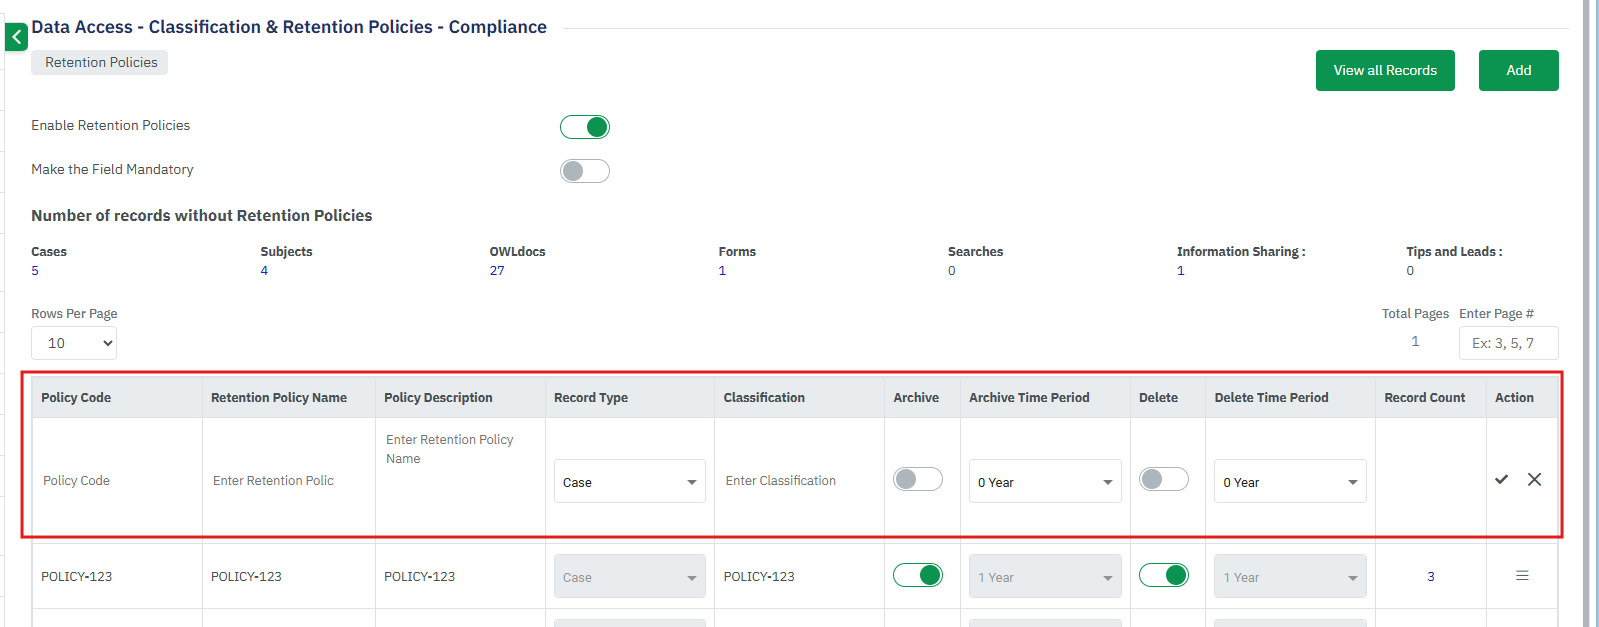
Policy Code: Enter the unique Policy Code.
Retention Policy Name: Enter the Policy name.
Policy Description: Enter the description of the policy.
Record Type: Choose the record type that will be used to create the policy.
Classification: Enter the classification details.
Archive: Enable the flag if considering the Archive period.
Archive Time Period: Select the number of years for the archive records.
Delete: Enable the flag if considering the Delete period.
Delete Time Period: Select the number of years for the Delete records.
Record Count: This will show the number of records that are using this policy.
Actions: After adding all these above details click on the “Save” button.
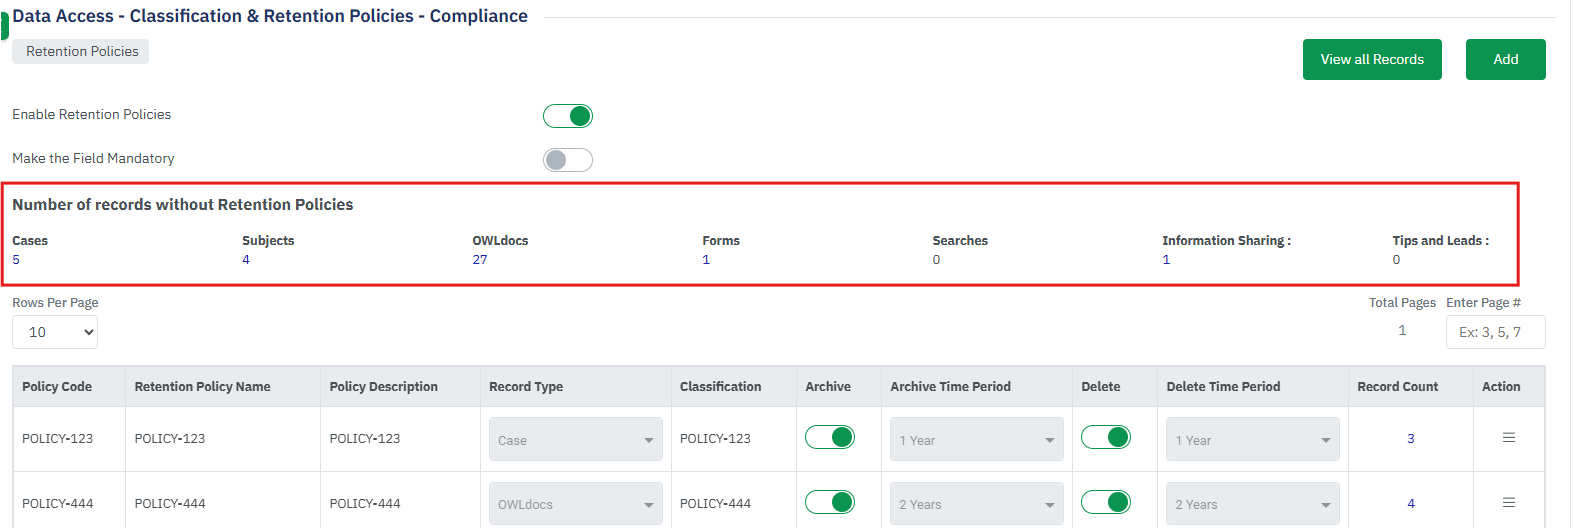
There is a section called “Number of records without Retention Policies” on the Retention policy page. This will show all types of records count for those any retention policy is not selected during record creation.
Click on Cases records count will open a popup with a list of all case records that do not have any retention policy. Admin can edit these records from the Action menu and update the retention policy.
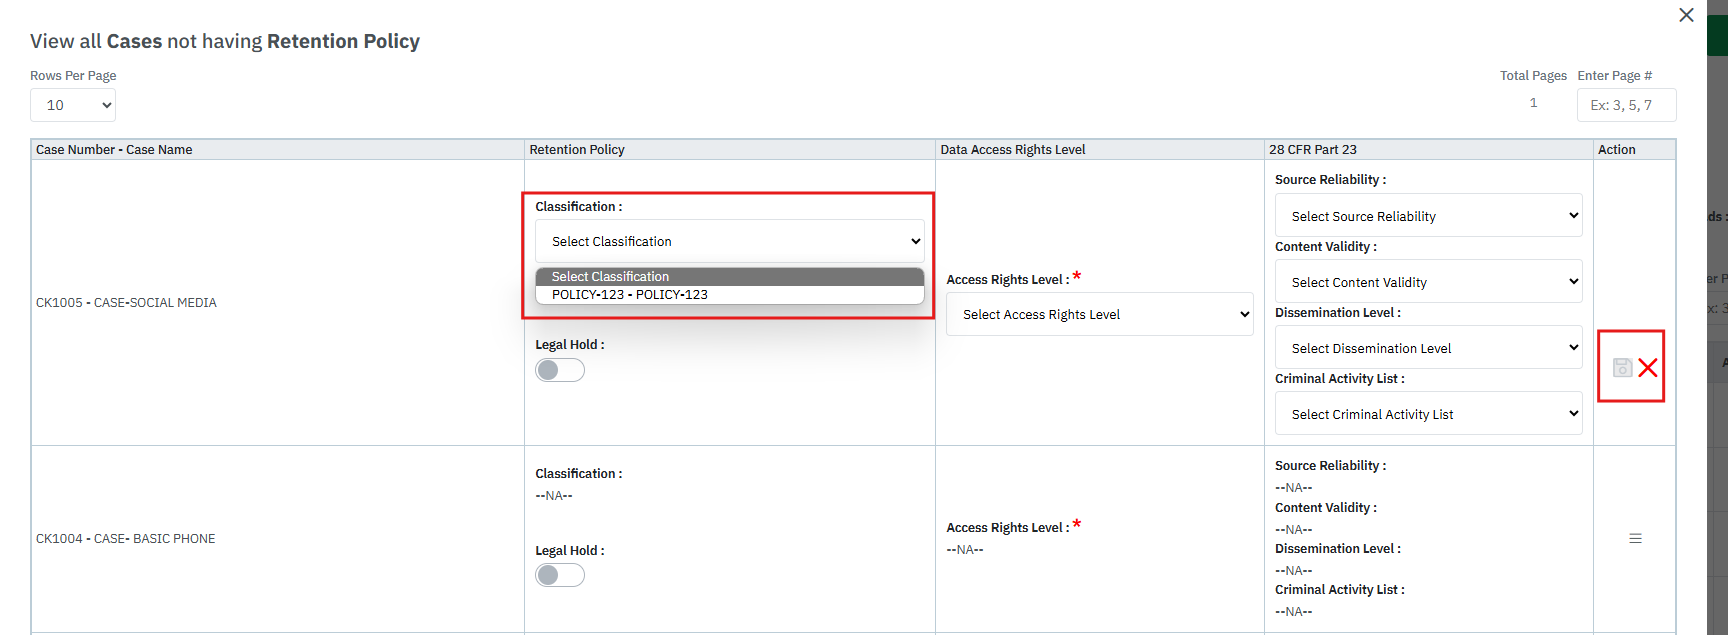
Once the policy is added these records will be removed from the list and the count will reduce.
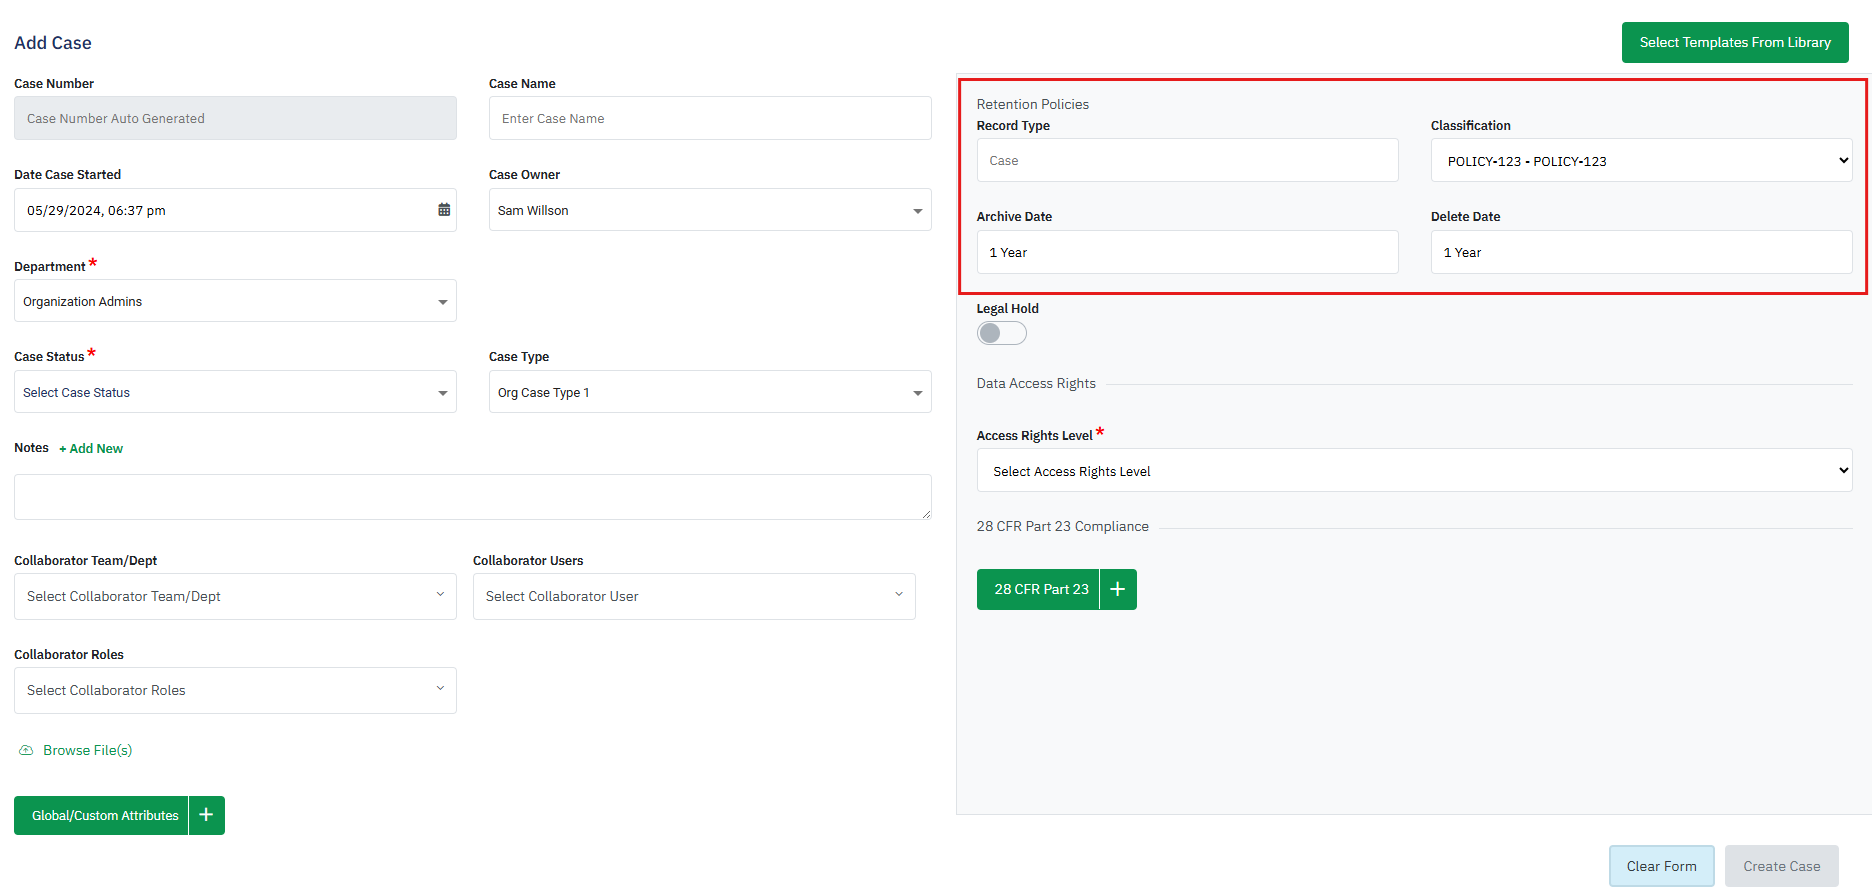
Below is an example of a Case record having the Retention policy fields.
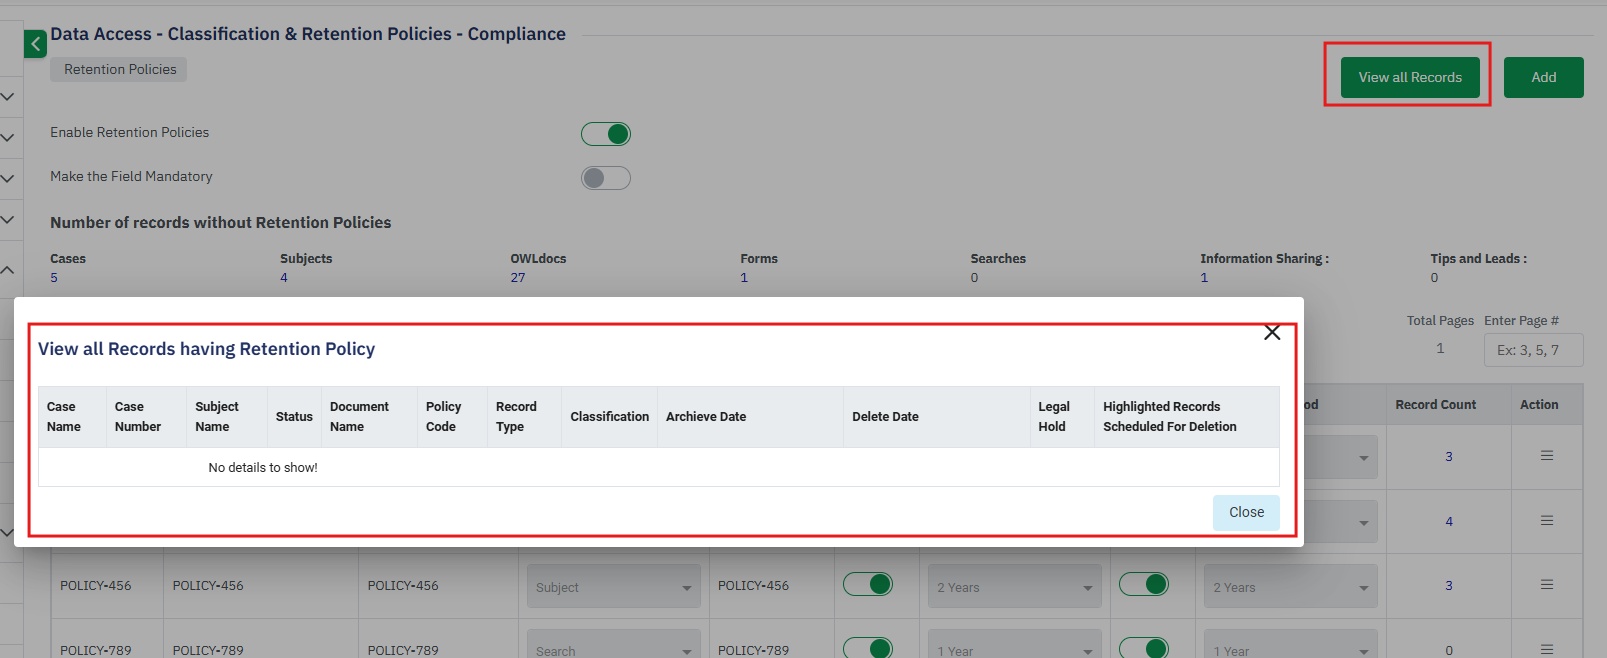
There is a button called “View ALL records” next to the Add button on the retention policy page.
Click on the button that will open a new popup window with all the records that are having the retention policy.
