- 25 Sep 2024
- 3 Minutes to read
- DarkLight
Template Builder
- Updated on 25 Sep 2024
- 3 Minutes to read
- DarkLight
OWL Software Edition Module or Feature Available In
Whooster
Standard
Advanced
Enterprise
Enterprise Plus
Enterprise Advanced
Smart City
A standout feature of OWL Admin is its robust template builder, which empowers administrators to create custom user interfaces (UIs), forms, and input screens effortlessly. Leveraging a global attribute database containing thousands of pre-defined fields, administrators can build tailored templates that align with organizational standards and workflows. The template builder supports a variety of input elements, including custom lists with options for single-select, multi-select, checkboxes, and radio buttons. This versatility allows administrators to capture specific data points relevant to different types of cases or processes efficiently.
In OWL, the Template Builder is a feature that allows users to add additional fields to a case, subject, or any record type as they need them. All these fields are user-defined and can be created by the administrators of the organization.
Steps to Access Template Builder Settings:
Click Administration.
Click Case Management.
Click Template Builder.
This will open the Template Manager page.
Steps to Add Templates:
Click Add Template from Template Manager.

User will be redirected to the Template Builder page.
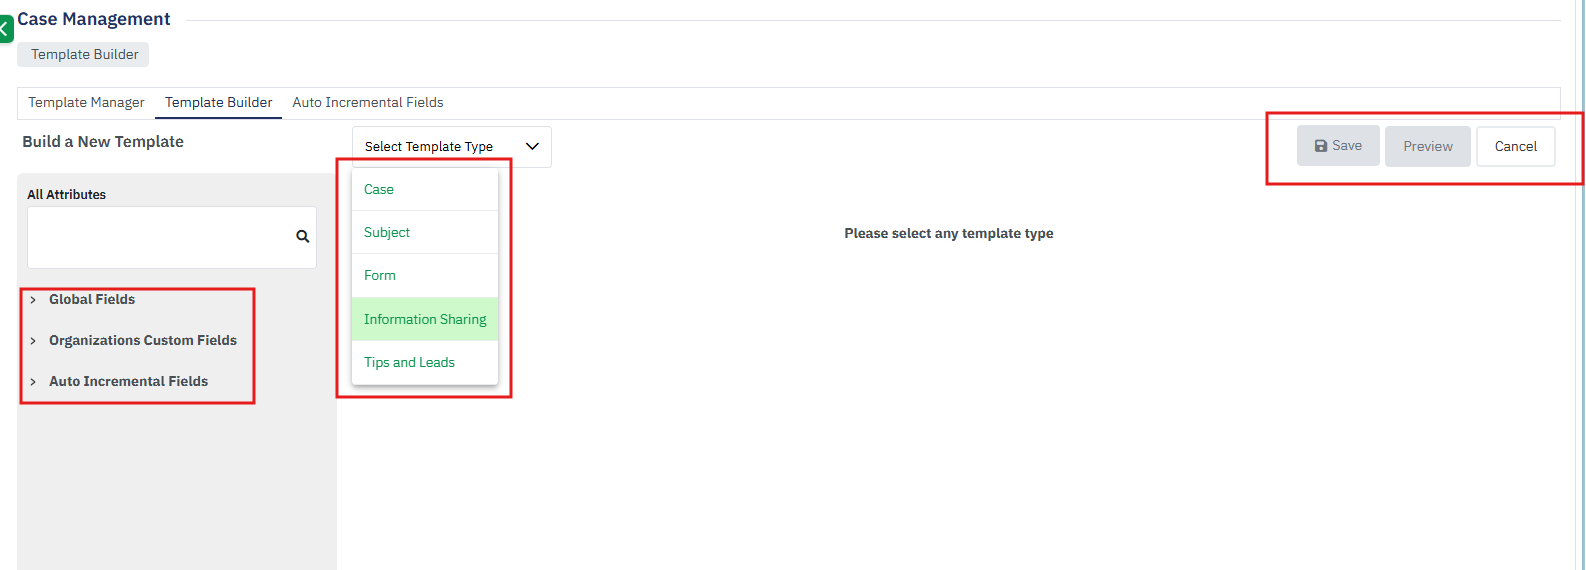
From within the Build a New Template page select the appropriate type of template to build from Select Template Type dropdown.
Once selected a popup window will display to add the Section name.
Enter the section name.

User can increase the number of section columns by increasing the section column. It cannot be increased by more than four.
Once added click Add New Section.
User will see the new section with the section name provided earlier and the number of columns.

The user can add more new sections by click on the Add New Section button or can add the sub sections under the individual section columns by clicking the Add Sub Section button. Sub sections and sections can be renamed using the edit option.

There are three types of attributes that can be added to the template. They are Global, Organization Custom, and Auto Increment Field.
Global Attributes are the attributes that are available under the OWL system and constant attributes. These cannot be duplicated or edited.
To add global attributes to the template click on the global attributes and open each attribute category further to see the attributes available.
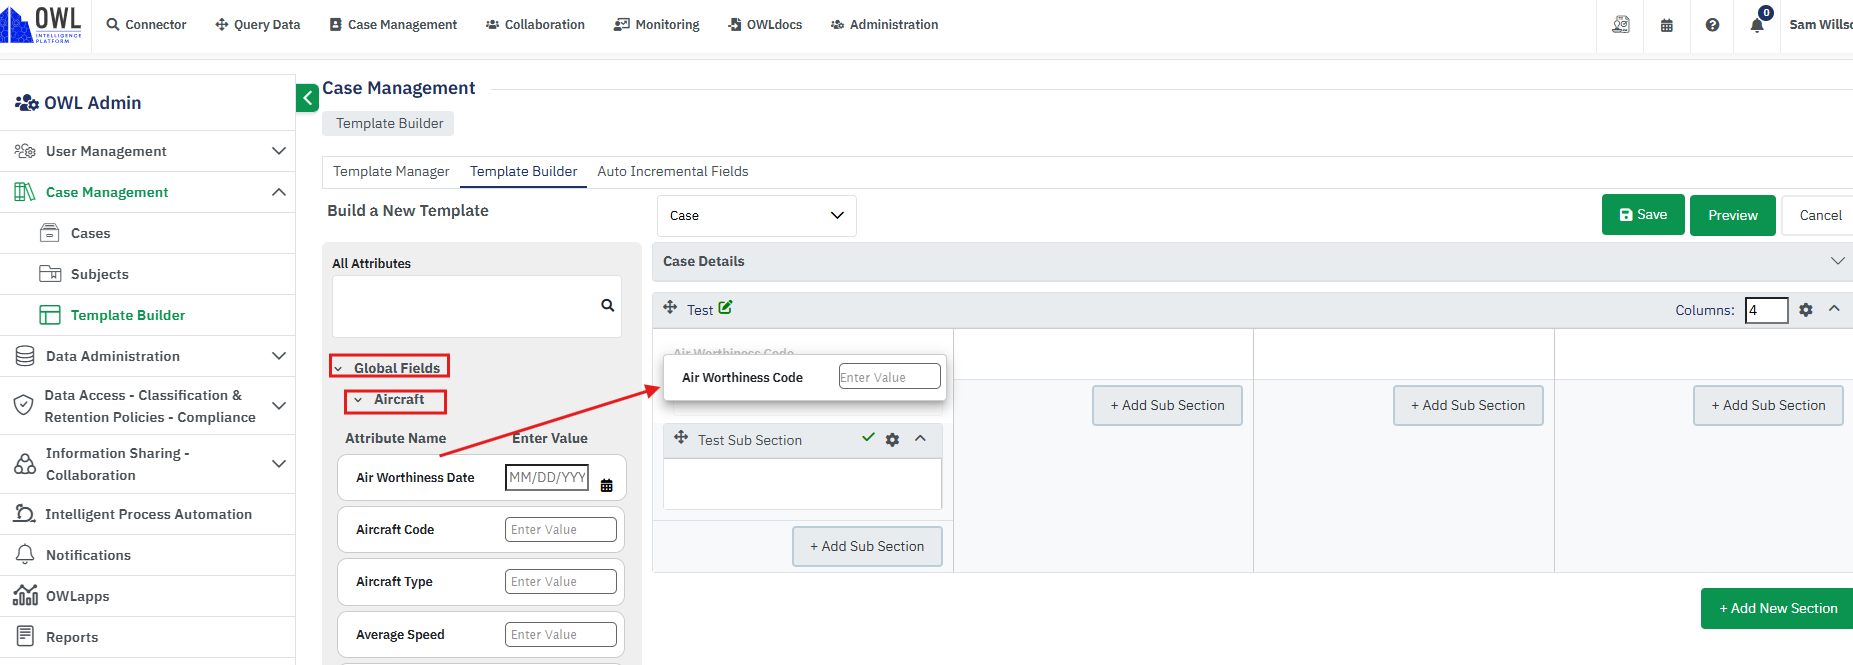
Drag attributes one by one and add them to the section columns or sub-section columns.
Organization custom fields are the fields that are user-defined. Users can pick what type of custom fields they want in the template. Once added each field can be provided with a label and what are the available options needed can be added to the field.

Click the green Save to add the field to the section.
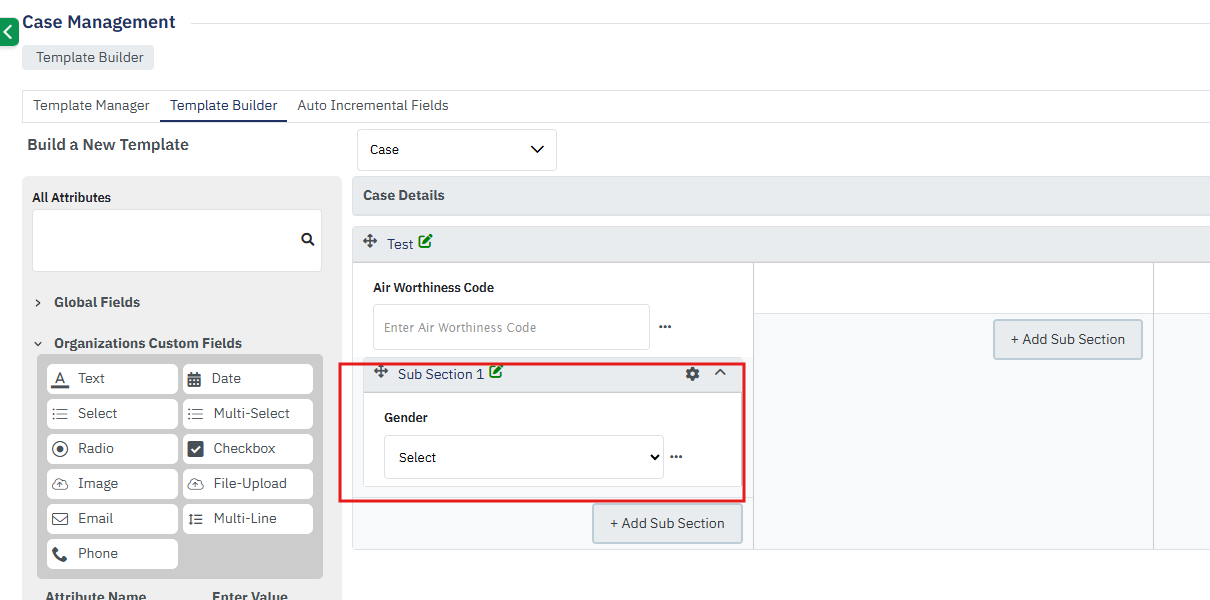
Auto Incremental Fields:
Click the Auto-Incremental Fields tab from the Template Manager page.
A new page will open a tabular view displaying existing Auto-Incremental Fields details.
This page will the Display Name of the Auto-Incremental Fields, Prefix, Start Number, Increment, Generated Code and Template Name.

Click on the “Add New ” button.
This will display the fields to add a new auto-increment field.

After adding all the fields click on the Save button.
This will create a new auto-increment field.

To edit the existing field, click on the Action menu and click on Edit. This will allow you to edit the prefix, start number and increment field. Once added click on the save icon.

Initially the auto-increment fields are not linked to any template. Once added it will display on the Template name column.
The auto-increment fields that are not linked will display under the Attributes section.
User can drag it and use it in the template.
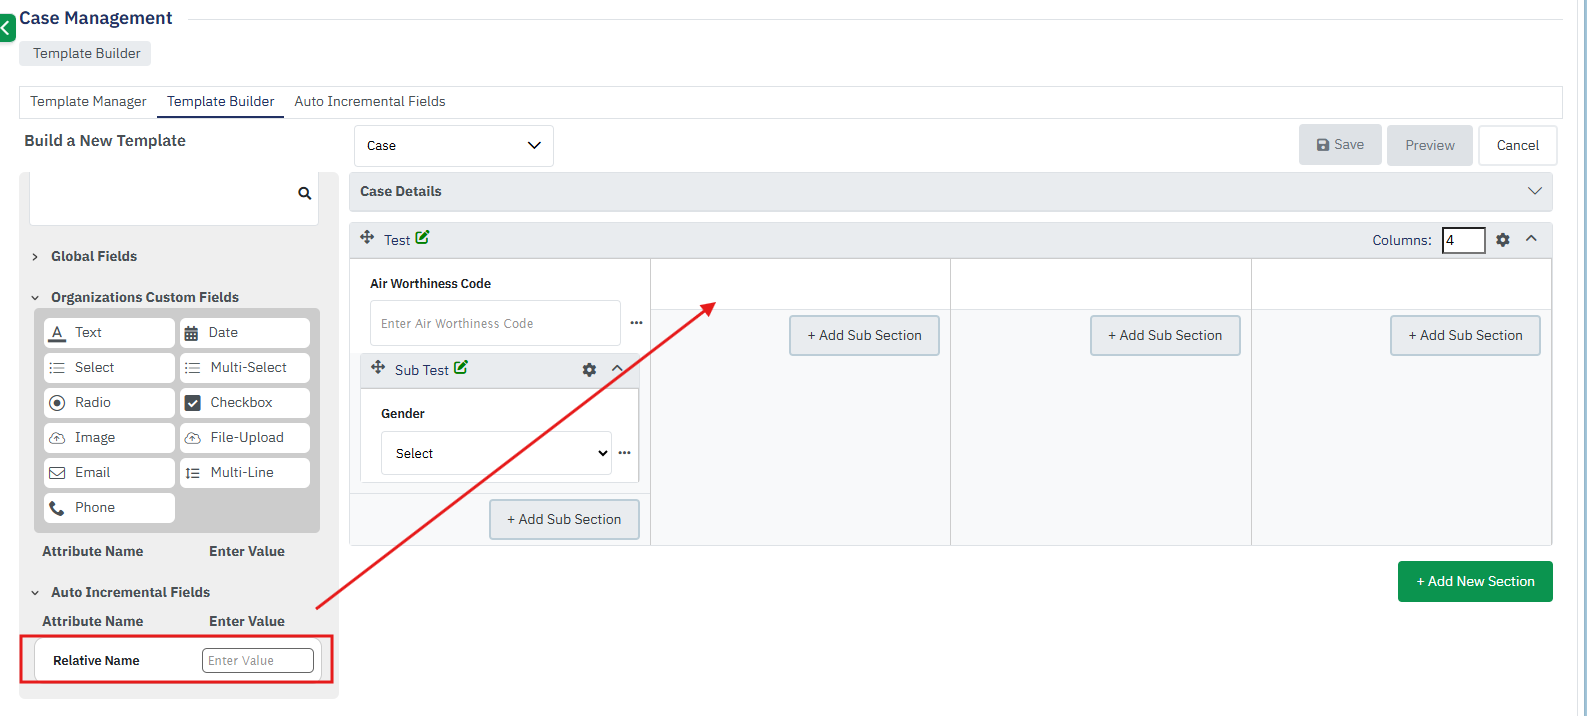
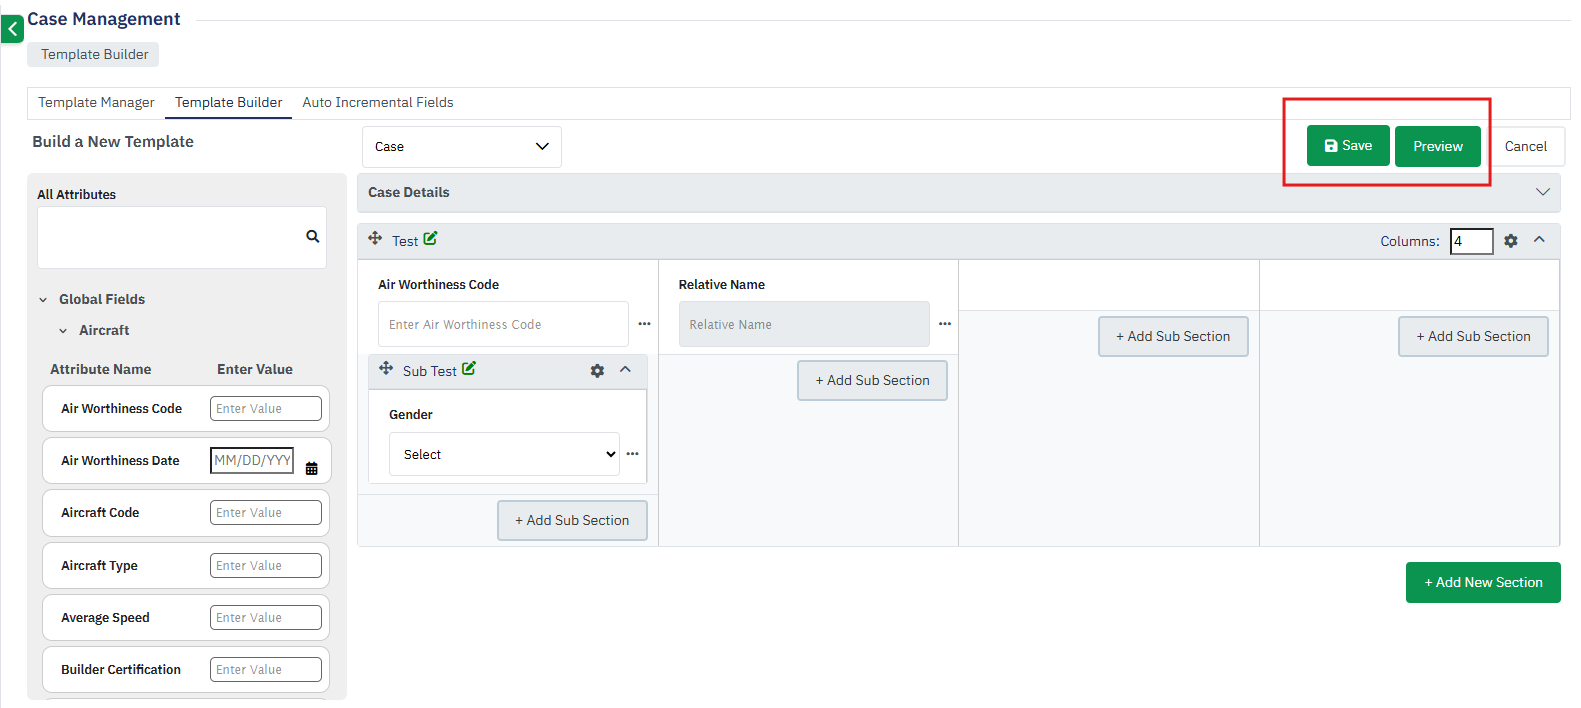
Once all the fields are added click on the preview to verify the template details before creating it.
After verifying click on the save button to create the template.
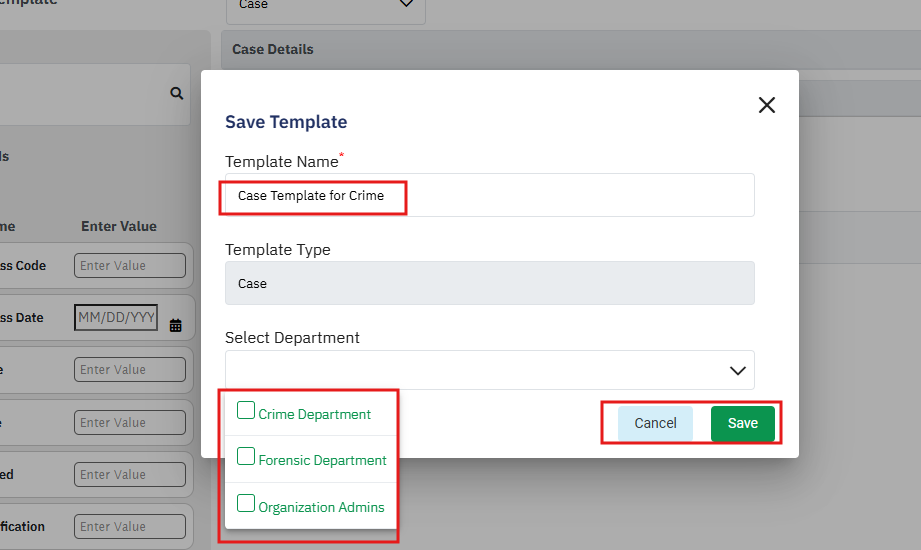
A popup will open to provide the template name. Enter the template name and select the department from the department dropdown to which this template will be available.
Template manager:
The new template will be displayed under the Template Manager. By default, these templates will be draft state.
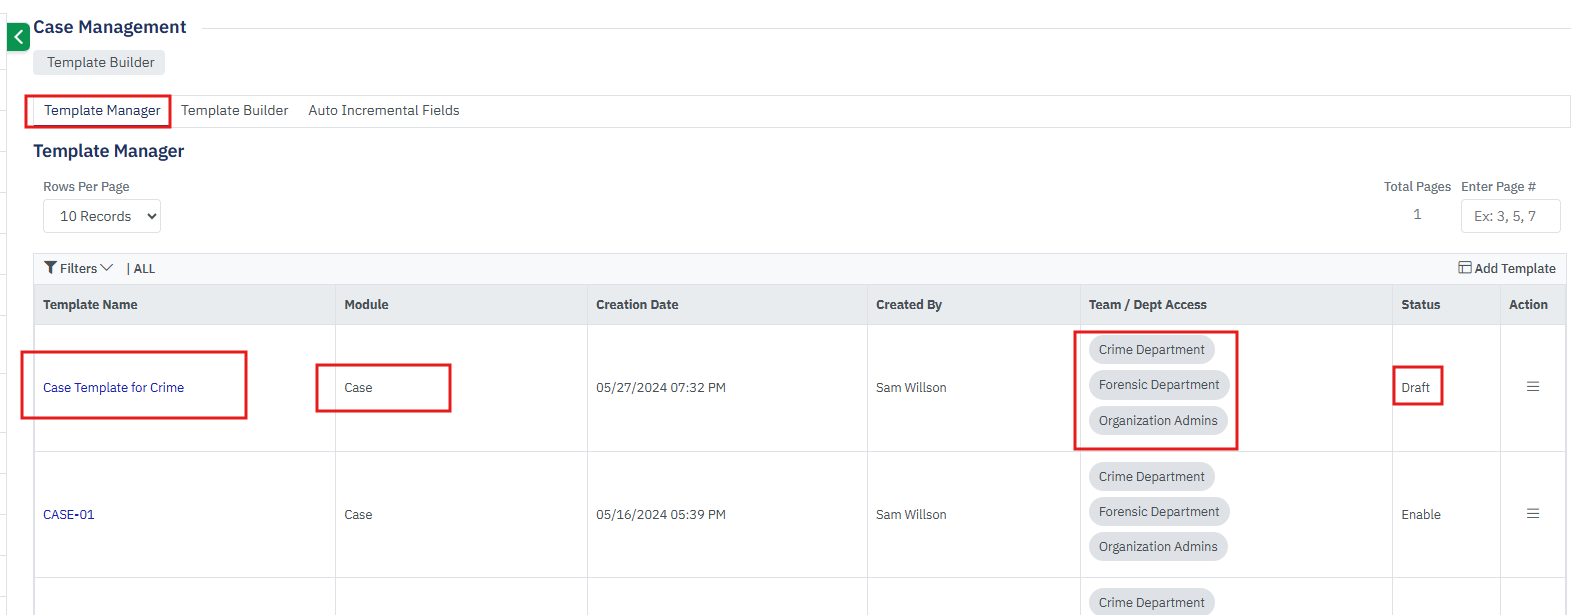
The table will show the module name, created date, created by and departments linked.
User can edit department details and enable the template from the Action button present in the action column.
After editing click on save to update the template.
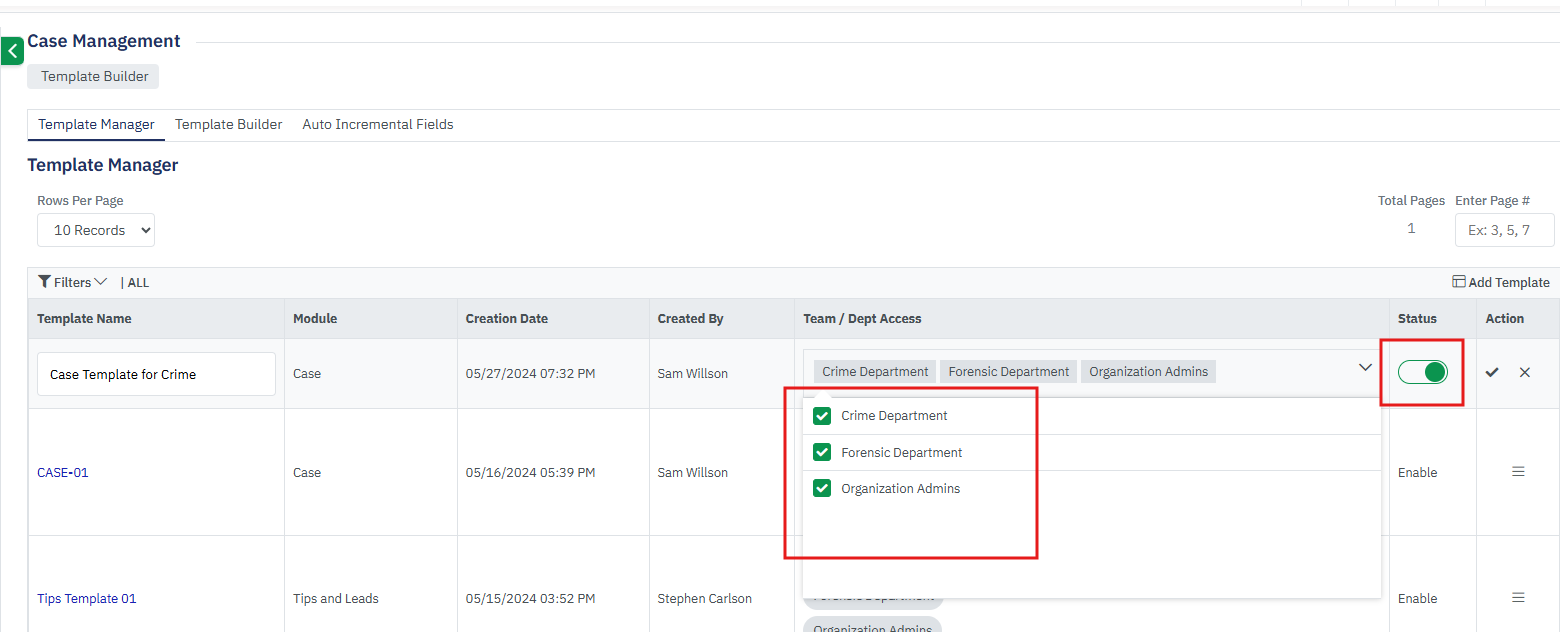
The enabled templates are now can be accessed from the create record page concerning their record type.

