- 25 Sep 2024
- 4 Minutes to read
- DarkLight
Add Subject
- Updated on 25 Sep 2024
- 4 Minutes to read
- DarkLight
OWL Software Edition Module or Feature Available In
Standard
Advanced
Enterprise
Enterprise Plus
Enterprise Advanced
Smart City
OWL facilitates the management of subjects, entities, and objects that are the focus of investigations, streamlining the process of handling information on individuals or groups under scrutiny for various reasons.
OWL provides a user-friendly interface for adding new subjects to the system. Investigators can input relevant details such as name, date of birth, address, aliases, affiliations, and any other pertinent information. The platform offers predefined fields to ensure consistency and completeness when adding subjects. Additionally, OWL can integrate with external databases or sources to automatically populate certain fields, reducing manual data entry and minimizing errors.
Steps to Add Subject:
Hover over Case Management.
Hover over Subject.
Click Add.
The Add New Subject page will open.
Enter the Subject Label, select the Record Owner, and the Subject Status. These are required fields. Additional fields can be completed as needed.
Click on Create Subject. The subject will be created, and a success message will appear on the screen. Once a subject has been created, it can then be linked to a case.
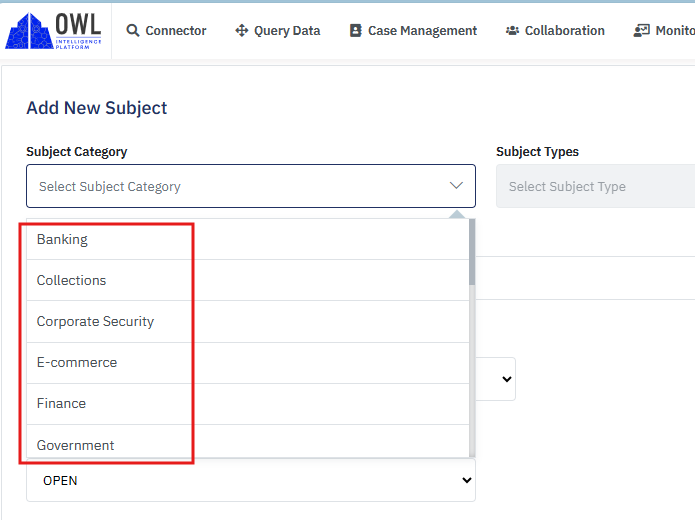
Subject Category: Relevant category can be selected from dropdown.
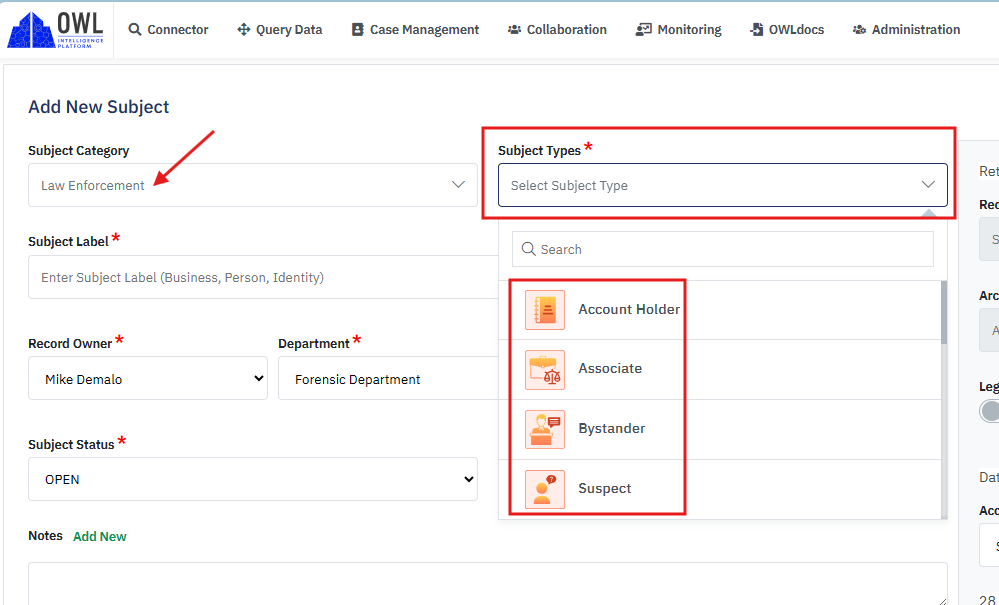
Subject Types: The type can be selected from the dropdown list. This field may not be accessible based on your organization’s administration configurations.
Subject Label: You can enter the name of the subject here. This will also be the display name. 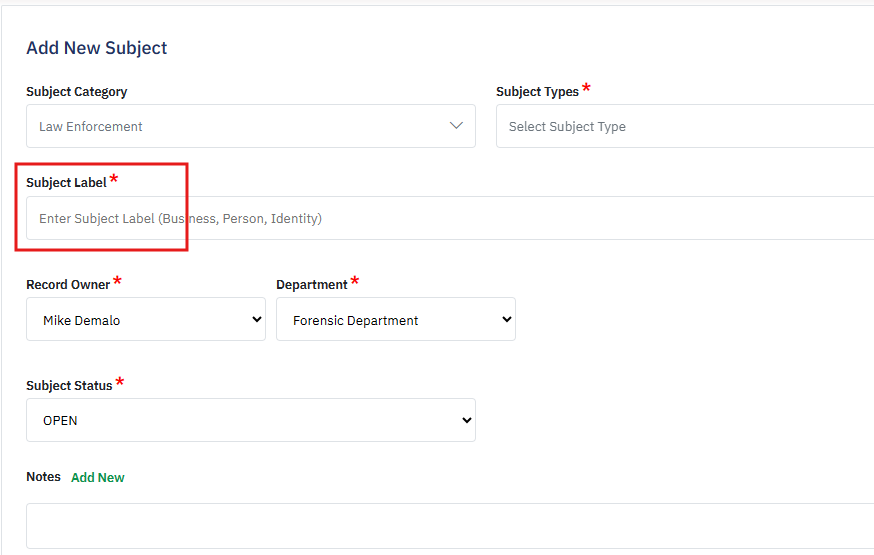
Record Owner: The name of the user creating the record will default here. This can be changed from the dropdown which will display available users based on the selected department
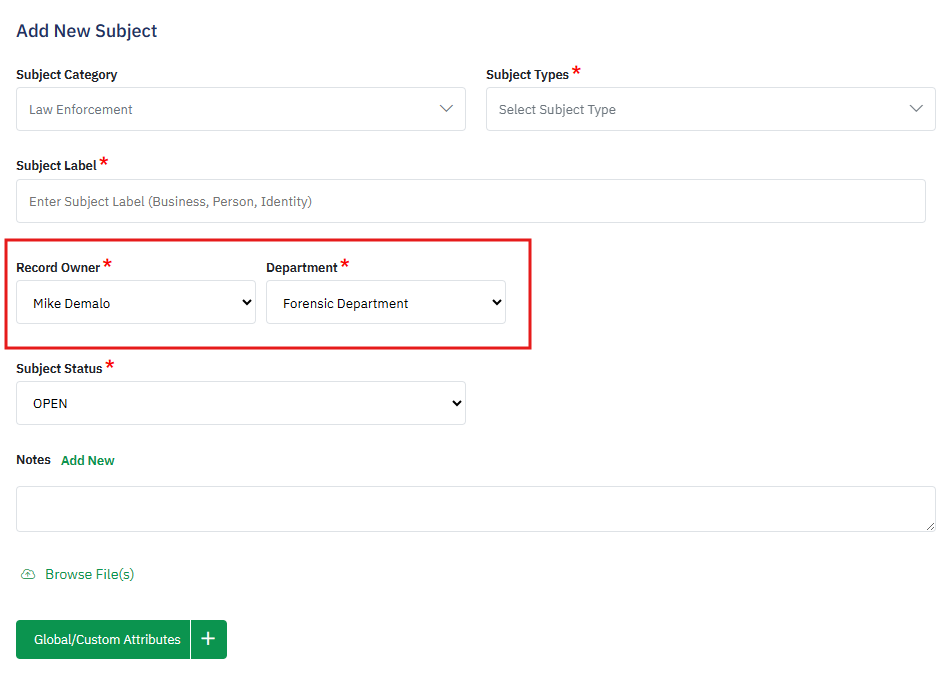
Department: The department the Record Owner belongs to should be selected here.
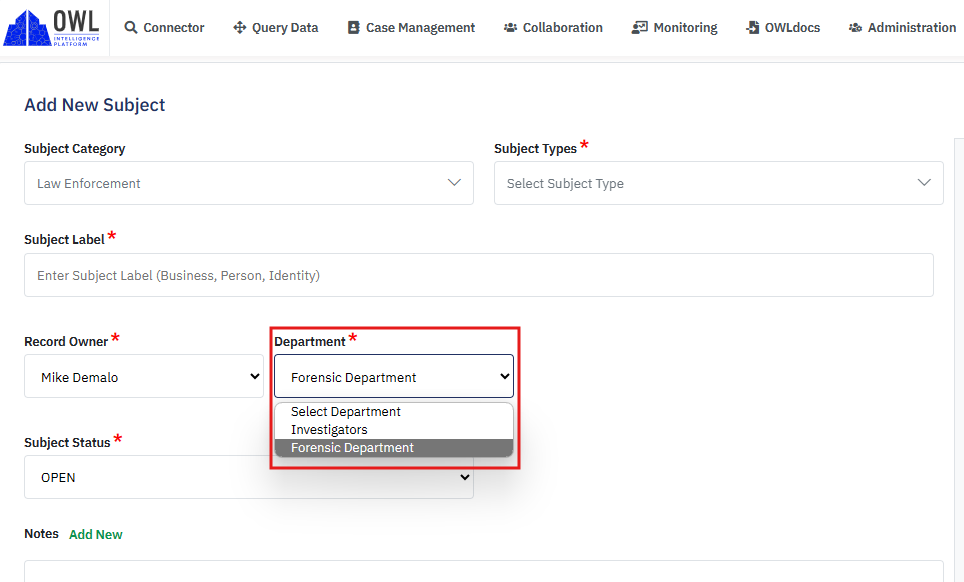
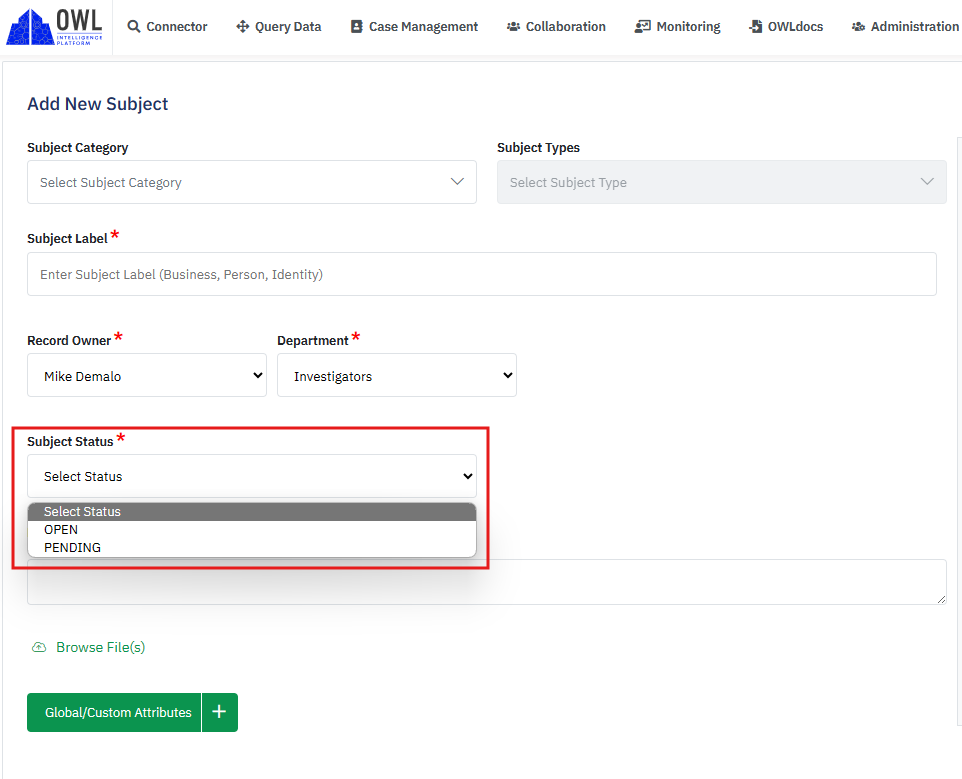
Subject Status: During creation, a subject can be given an Open or Pending status within this field. This field is not required and the subject will default to an Open status if no selection is made.
Add Global/Custom Attributes: An investigator may have more information related to the subject, the investigator can select a global list of fields that is pre-built in the application and add data or additional information as custom fields (attributes) and data (values) to the subject.
Record Type: If the Retention Policy is activated, this field will be displayed on the Add Subject page. This is a system generated field. By Default, it is Subject.
Classification: If the Retention Policy is activated, this field will be displayed on the Add Subject page. This will be a dropdown choice created by the organization within the Administration Module.
Access Rights Level: A security clearance is a status granted to individuals allowing them access to classified information or too sensitive information. Security clearance is at a hierarchical level. A security clearance is granted to an individual and recognizes a maximum level of clearance. The Security Clearance module is not mandatory for all accounts. During the OWL account setup, the Security Clearance is set based on the customer's interest. If the organization has opted for Security Clearance, it is set up for the account and users. Users/collaborators who have access rights equal to or higher than the subject access rights can access the Subject.
28 CFR Part 23: If activated, the 28 CFR Part 23 section will be displayed on the Add Subject page. Select the required data from the dropdown.
Archive Date: If the Retention Policy is activated, this field will be displayed on the Add Subject page. This is system generated from the Administration module based on record type and classification.
Delete Date: If the Retention Policy is activated, this field will be displayed on the Add Subject page. This is system generated from Administration module based on record type & classification.
Legal Hold: Enable this toggle if the Subject record should be marked as Legal Hold. Once enabled it CANNOT be disabled.
Legal Hold Date: When Legal Hold is enabled, the Legal Hold Date field will populate with the current date.
Link Subject to Case: After creating a new subject, the record can be linked to an existing case or a case can be created on the fly and then linked.
Steps to Link Subject to Case:
Once all subject details have been saved, click Link Subject To Case.
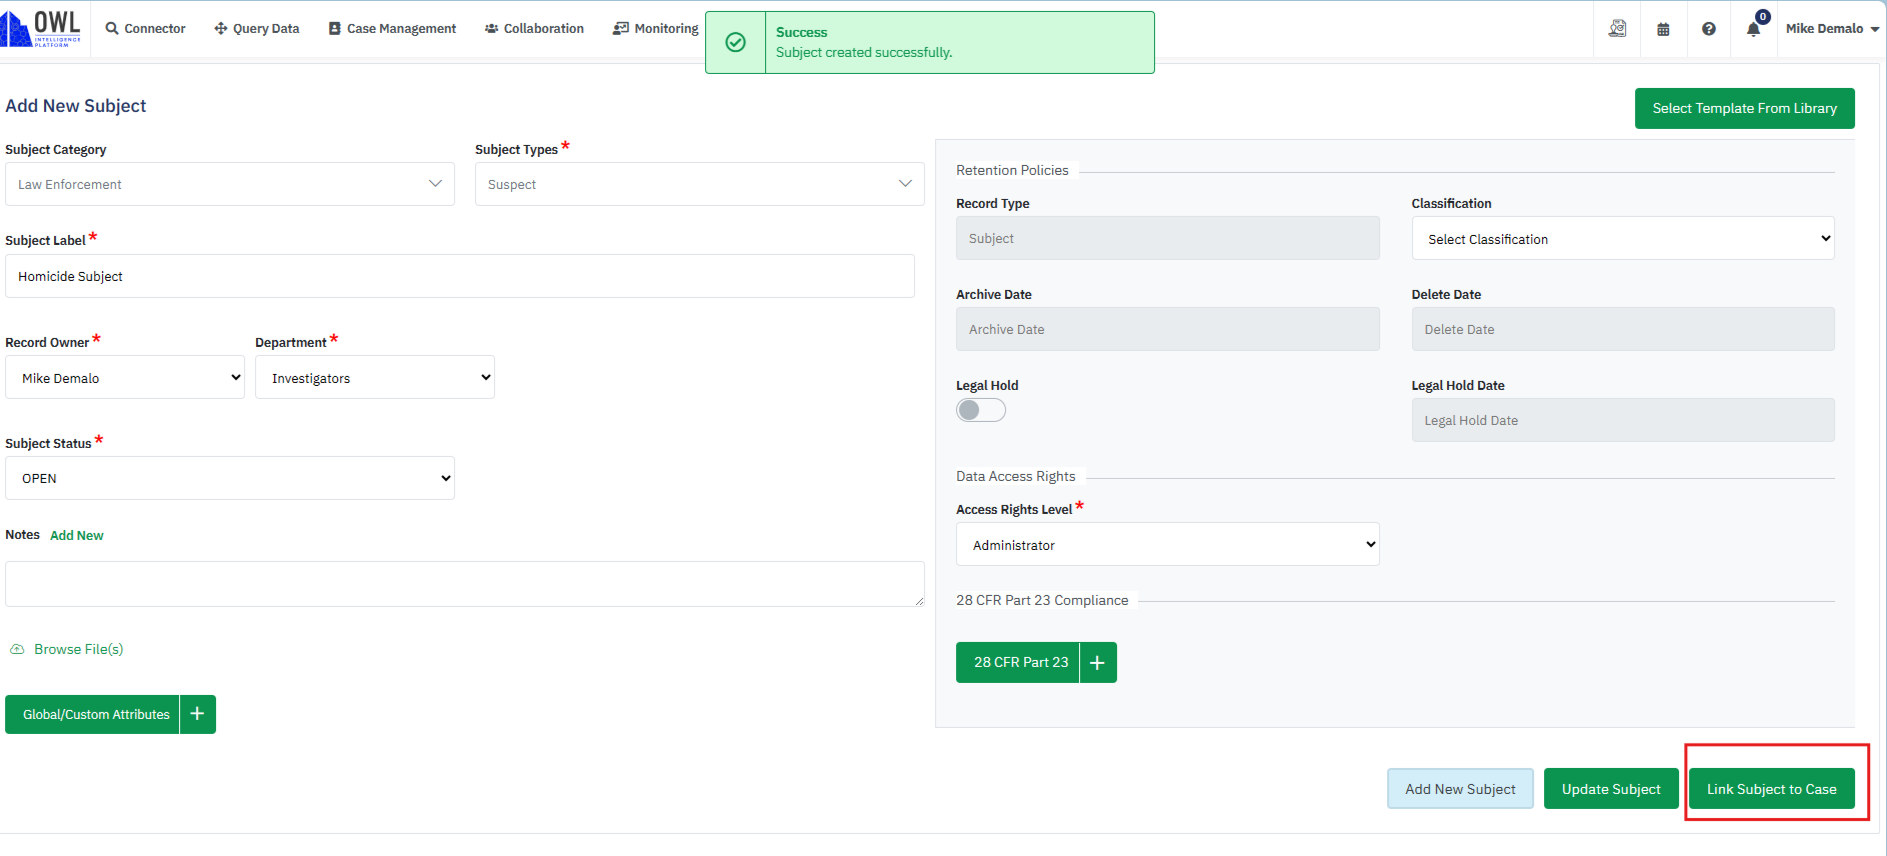
This will open the Select Case To Link dropdown on the Subject record page. By default, the dropdown will display all active cases.
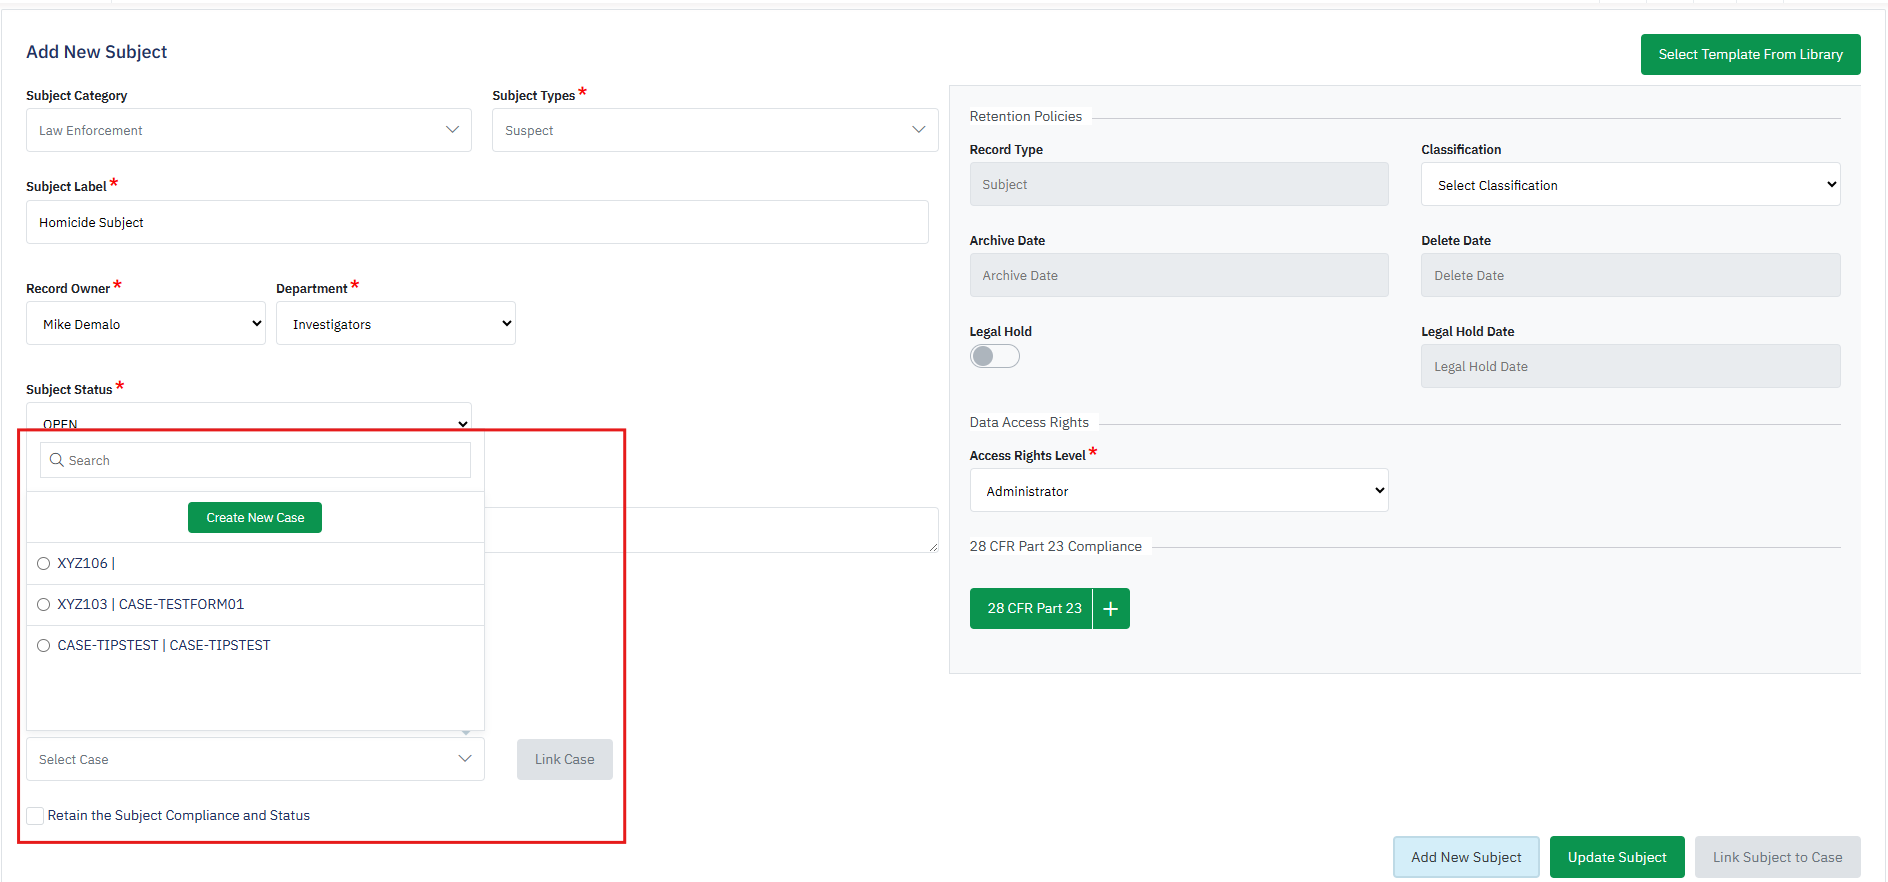
Select a case from the dropdown and click Link Case. This will complete the action.
If there is no existing case to link the subject to, a new case can be created from the same page by clicking Create a New Case. This will open the Add Case page in a popup window. Complete all information as required and click Create Case. Once created the case number will be auto selected within the Select Case dropdown.
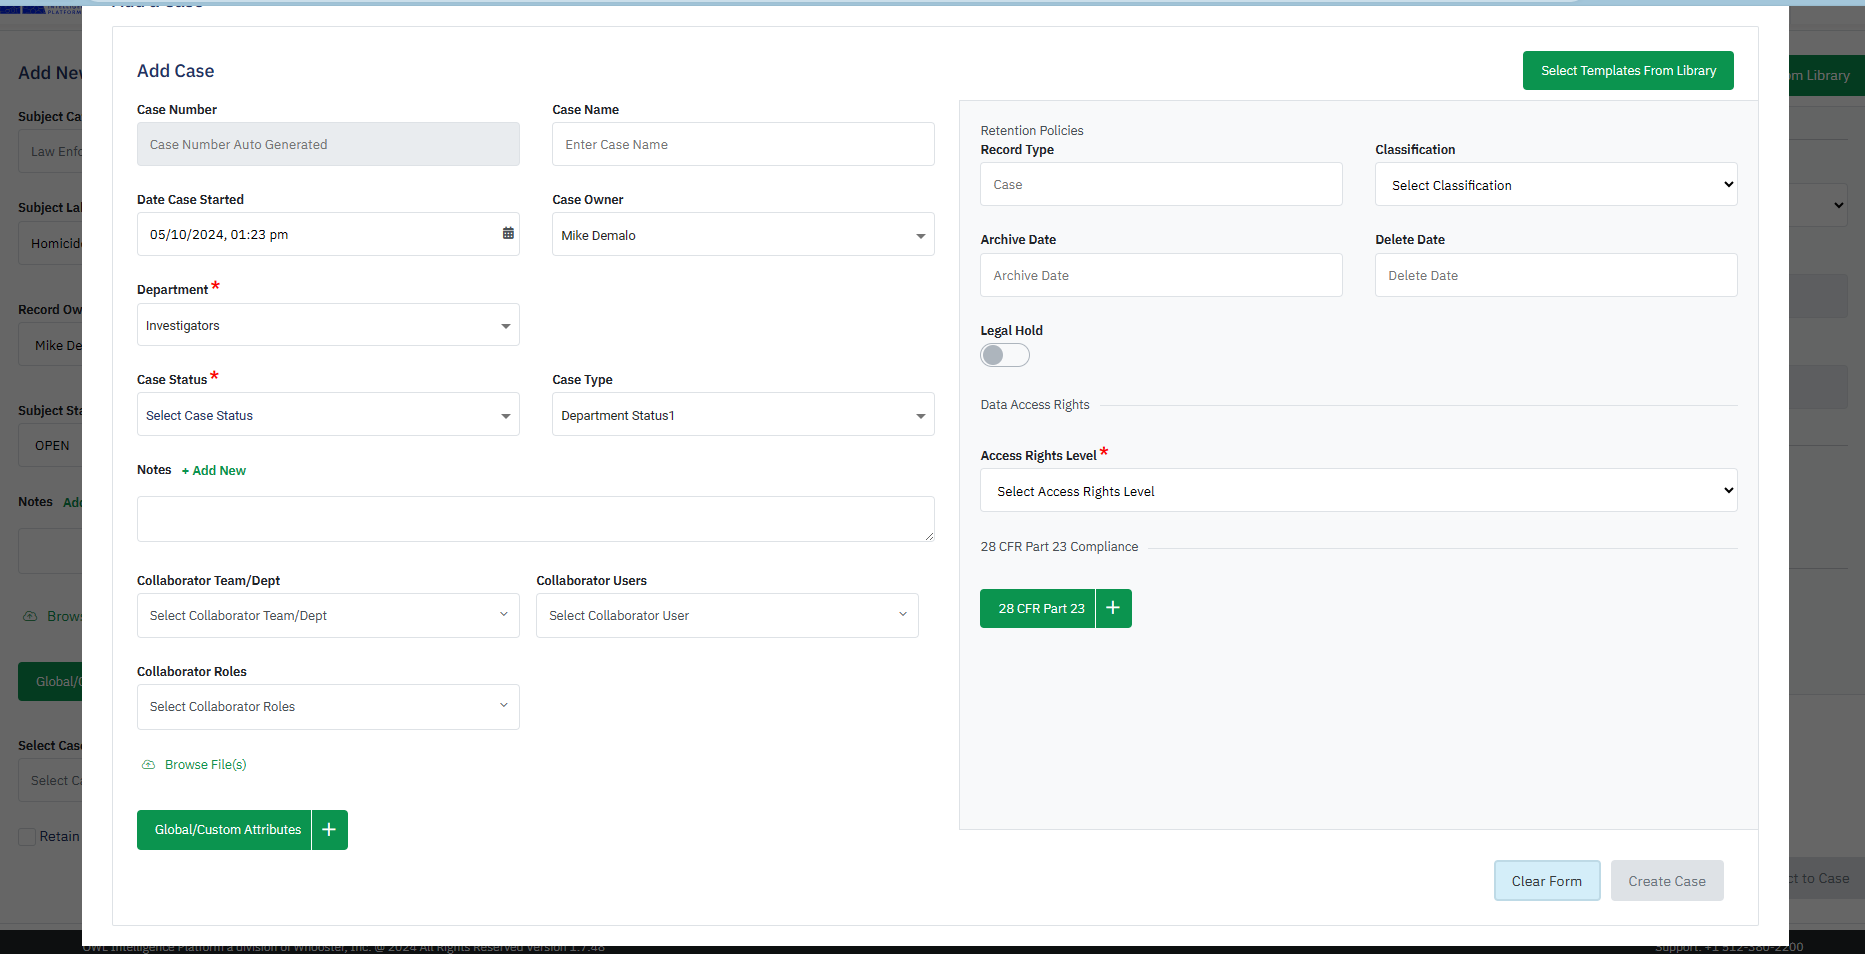
Click Link to Case to complete this action.
Select Template From Library:
Subject templates already defined by the administrator can be added to a subject while creating the record. This is done by clicking Select Template From Library.
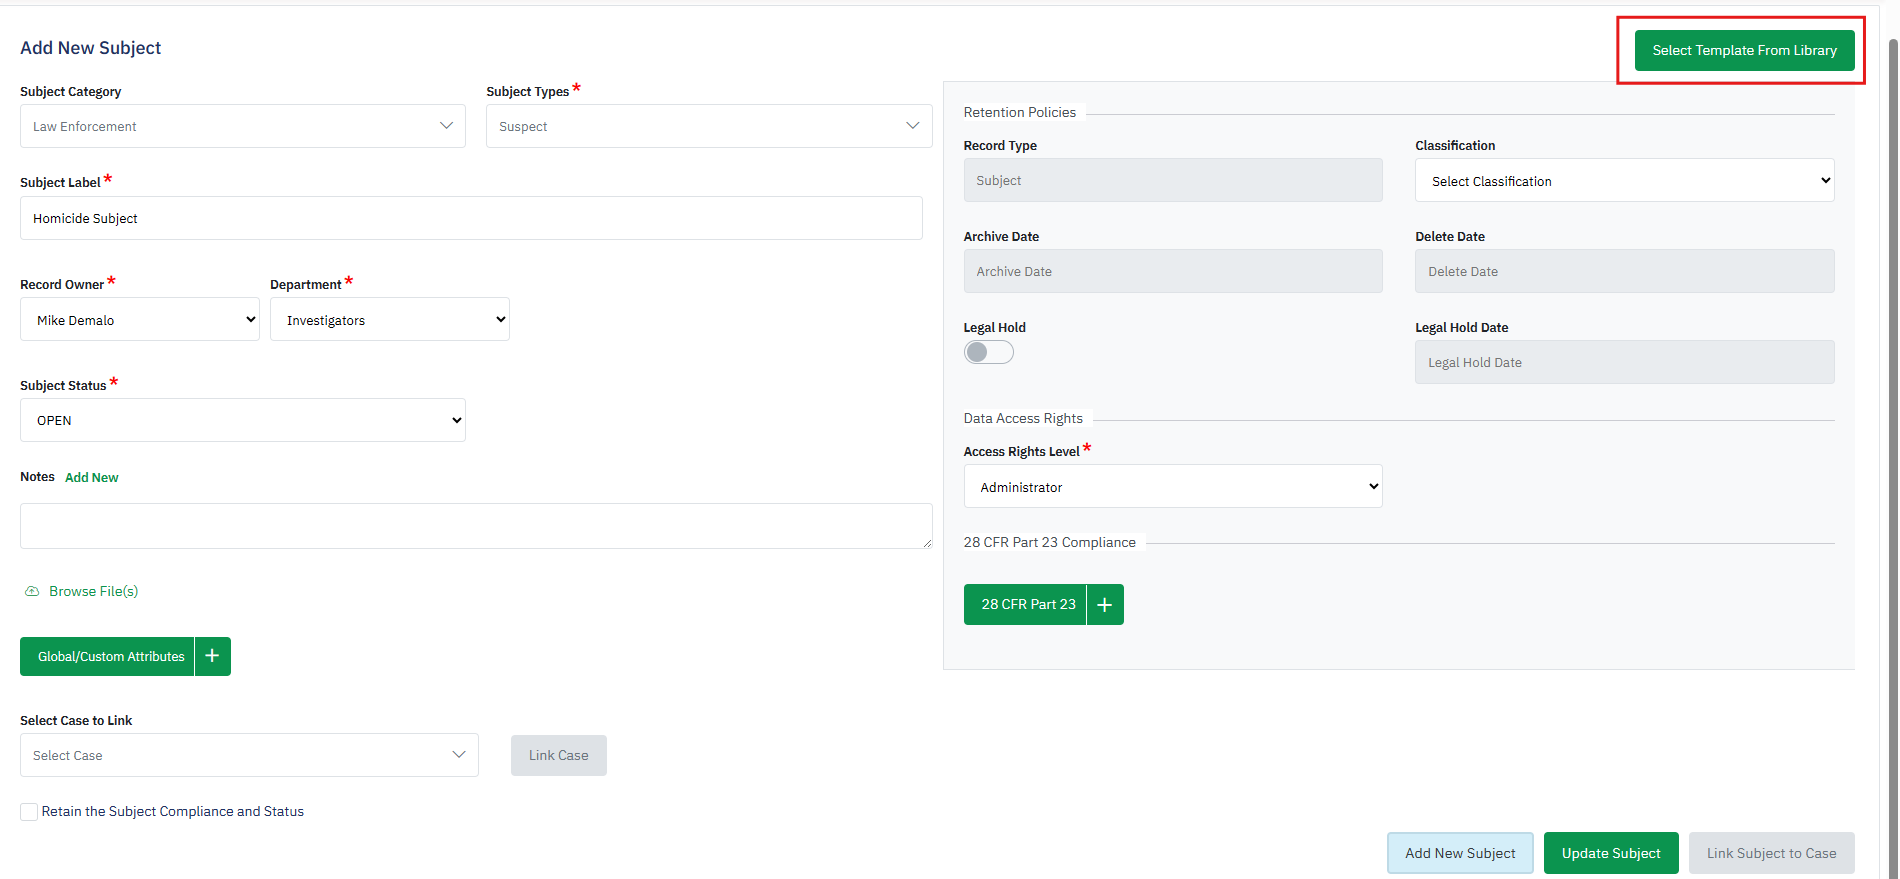
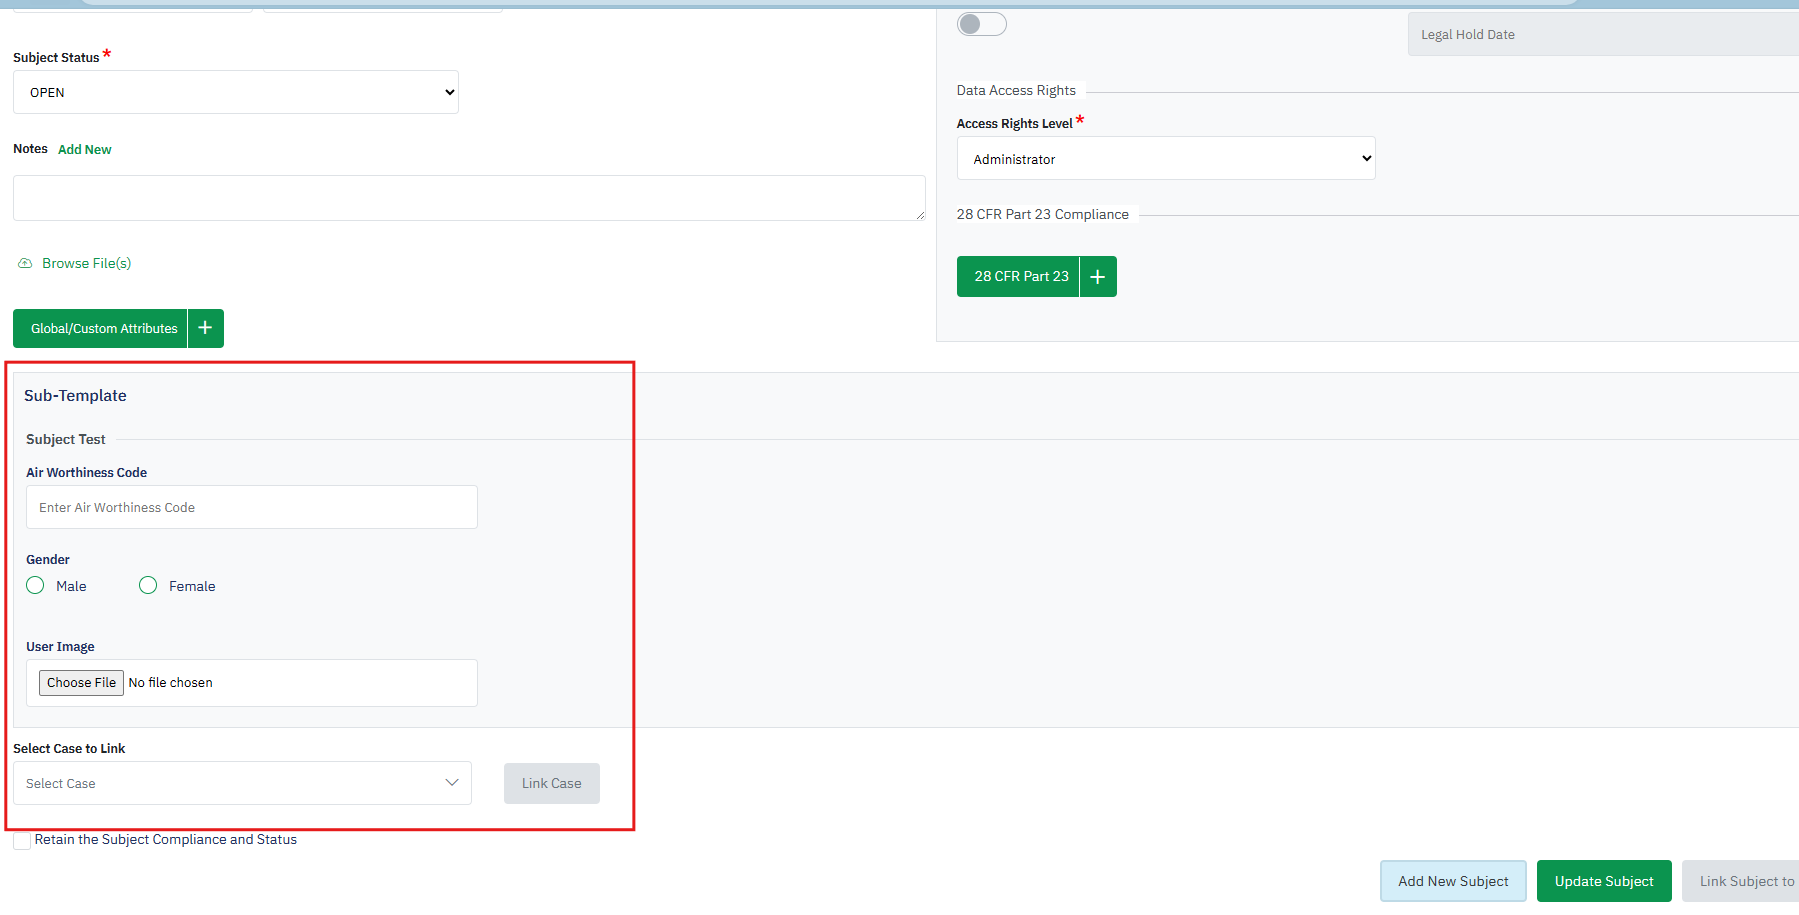
Select available templates as needed to add them to the subject record. Relevant template fields will then be reflected within the subject record.

Complete the template fields and click Update or Create Subject to complete this action.
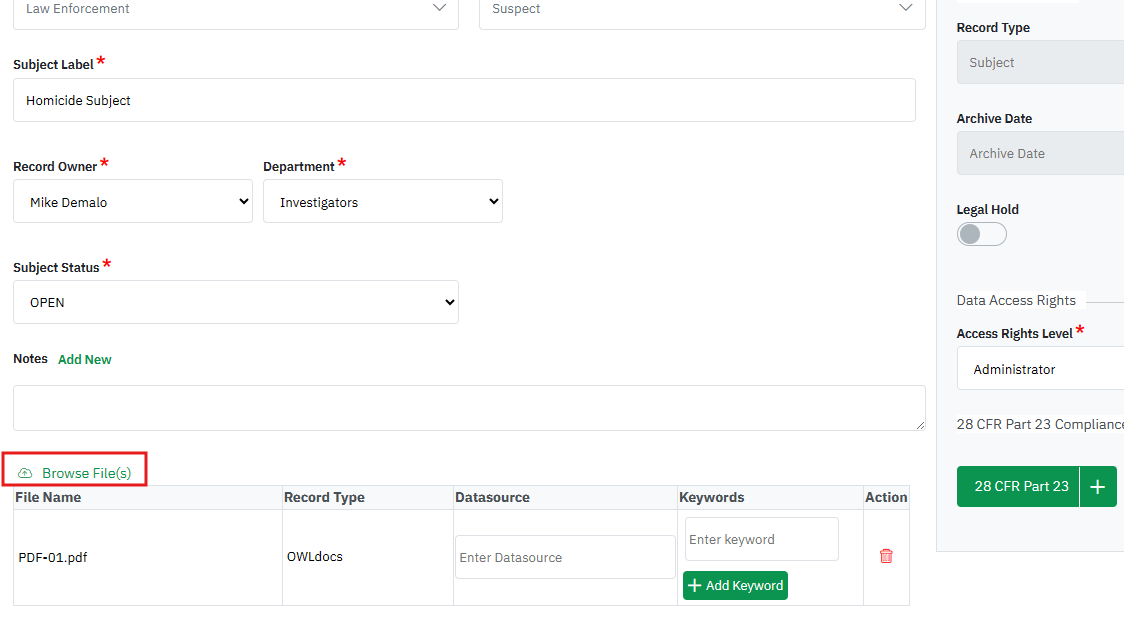
Browse Files(s): Documents can be attached while creating the subject by clicking Browse Files.
