- 25 Sep 2024
- 5 Minutes to read
- DarkLight
Cases
- Updated on 25 Sep 2024
- 5 Minutes to read
- DarkLight
OWL Software Edition Module or Feature Available In
Whooster
Standard
Advanced
Enterprise
Enterprise Plus
Enterprise Advanced
Smart City
The very first section under case management is cases. This page has different features that provide a few restrictions during searches or creating/updating case details.
In the OWL platform, the "Cases" section under case management serves as the foundational interface where administrators and users interact with and manage various cases, incidents, requests, or tasks within the organization. This section is equipped with a range of features designed to ensure efficient management while providing necessary restrictions to maintain data integrity and security.
Cases
Case Name
Case Status
Case Type
Auto Generated Case
Cases
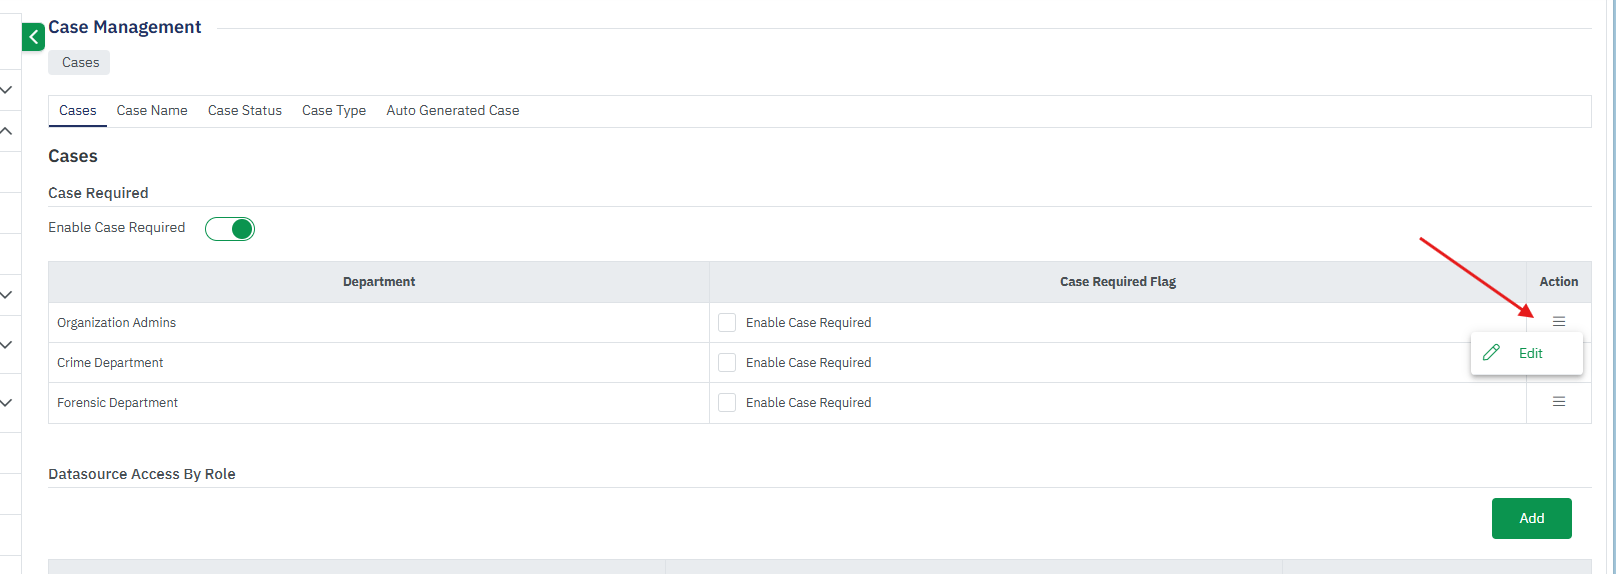
Case Required: The use of this feature enables administrators to enforce users to search under a case always.
Steps to Access Cases:
Click Administration page.
Click Case Management within the OWL Admin menu.
Click Cases.
Here you will find the Case Required toggle.

Click on the toggle to enable this requirement. Once it is enabled, the administrator can update the department-level flags using the Edit button located under the Action menu.

Select the departments you would like to require cases for. Once done, click the green check mark to save your update.

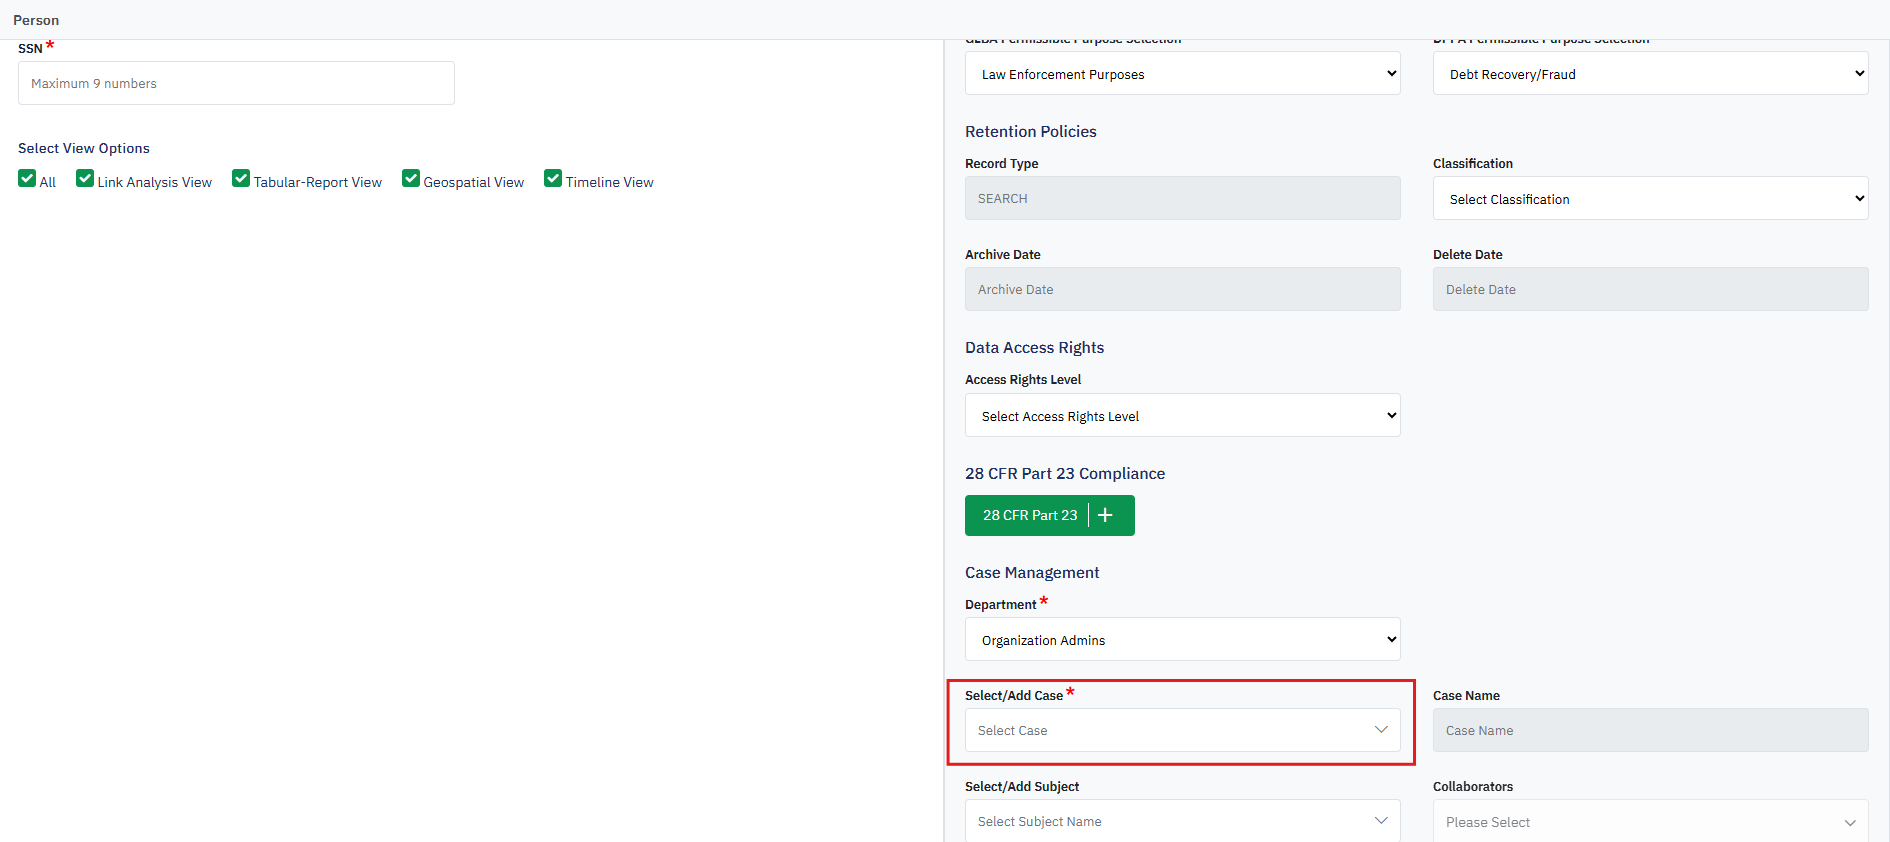
This requirement will now be marked with a red asterisk when users within the selected departments attempt to perform a search.

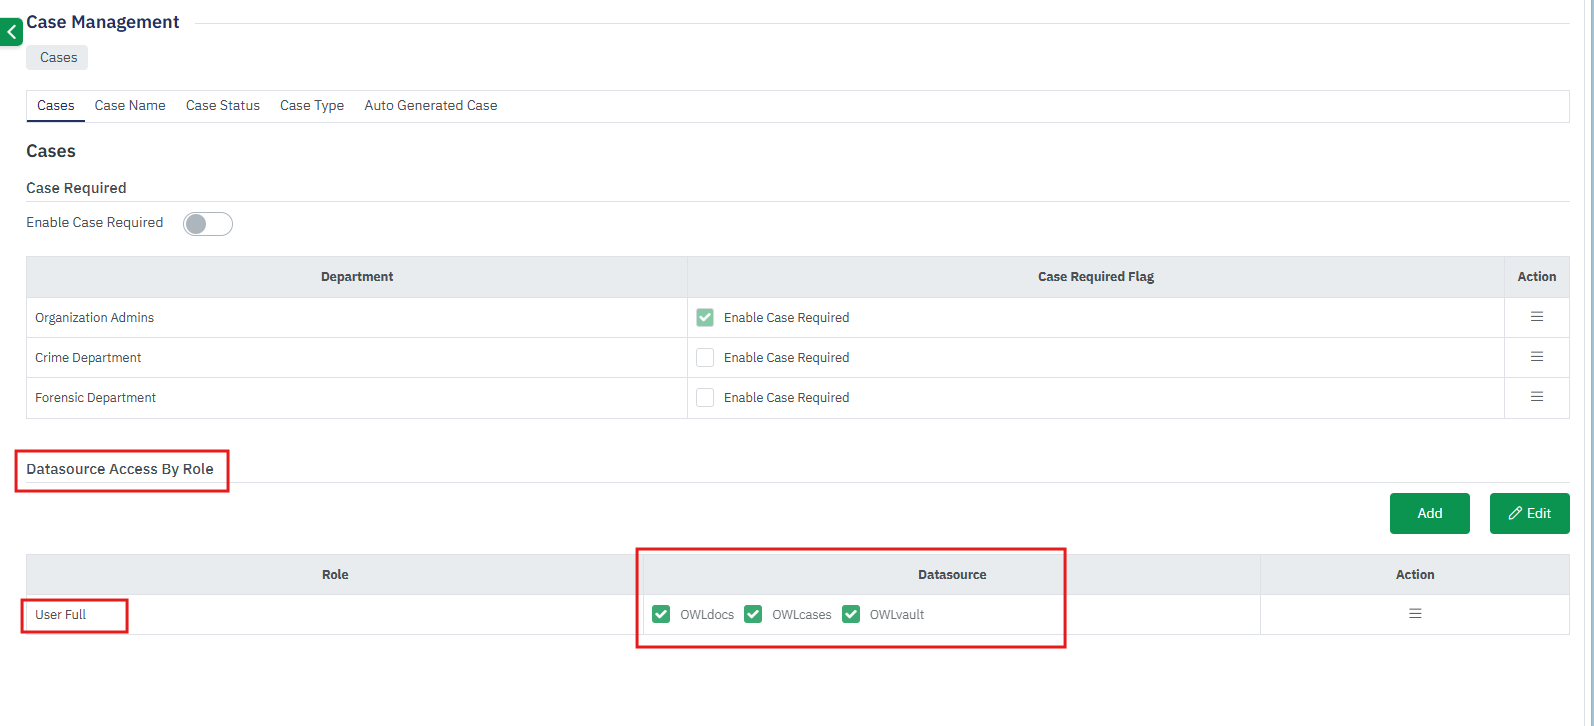
Data Source Access by Role: This section is defined for the OWL product search restrictions based on the organization roles.
OWL Products: 1. OWLdocs, 2. OWLvault, 3. OWLimport
Based on the selection of these products specific roles can use these features during searches. By default, the user can perform all product searches.

Steps to Edit Datasource OWL Products:
Click Administration.
Click Case Management within the OWL Admin menu.
Click Cases.
Scroll down to the Data source Access by Role section.
Click the green Add button.
The Role and Datasource dropdowns will open.
Select the appropriate Role and OWL Data Sources that should be required.
Click the green Save button.
This will create one entry into the Datasource Access by Role list.


From the product search page, if any user-full license wants to perform a search, he will get the OWL data search options to select based on the above setting.
Case Name
Administrators can require case names. When enabled, users will see Case Name as a required field when creating cases.
Steps to Enable Case Name Requirement:
Click Administration.
Click Case Management within the OWL Admin menu.
Click Cases.
Click Case Name from the horizontal tabs.
Click the Make the Case Name Field Mandatory While Creating a Case toggle to enable this requirement.
Once enabled, it will allow the admin to enable the flag for individual departments.
Based on these flags user from the relevant department creates a case within the Case Management module, the system will require the user to name the case.

From the Action menu, the administrator can enable or disable the department-level flags.

Case Status
Case status is a mandatory field for a case creation and update. Without a case status, a case cannot be created. In OWL there are three default case statuses.
System Level Case Status – These statuses are defined at the OWL system level. These cannot be deleted or modified.

Organization-Level Case Status – These are custom statuses created by the administrator at the OWL organization level. If no department-level status is provided, the organization-level custom status and system statuses can be used to create a case.
Department-level Case status – These statuses are also custom statuses defined by the organization administrator. Any specific department user can create a case by selecting department-level statuses if it is defined by the Admin.

Custom statuses can be added and edited by an Administrator. Click the green Add or Edit button to perform this action.

Clicking Add will open the Select Case Status and Select Team/ Department fields.
Select Case Status: Enter the new custom status’ name.
Select Team/ Department: If the status should be used within a specific team/ department, select the appropriate within this field.
If no department is selected, the status will be added at the organization-level status and can used by all all users within the organization.
Once all details have been added, click the green Save button to create. The status will be in a disabled state by default until enabled.

Click Edit from the Action menu. This will allow you to enable/disable the status or edit the status name.
If the status is enabled, then only it will be available for the organization/department users.
The Delete Case Status option will allow you to delete/remove the status.
The status can also be enabled under the Case Status Enabled column using the checkbox.
Case Type
Case Type is the field used under the case. This defines the type of case that is created. This field is not a mandatory field for a case. It can be removed by the administrator by using this feature.
The Case Type dropdown can be added to the case details during the create/update case by enabling the case type toggle.
Administrators can create case types at both Organization-levels and Department-Levels.
Click the green Add button to add custom case types.

Two new fields will be displayed after clicking on the Add button. The first field is to enter the name of the Case Type and the other field is the Department dropdown to which this case type will be available.

Clicking the green Save button will add the case types to either the organization if no department is selected or only to the departments that are selected while saving.
When the department-level case status is not enabled then default organization level case type will be displayed during creation of the case.
Auto Generated Case
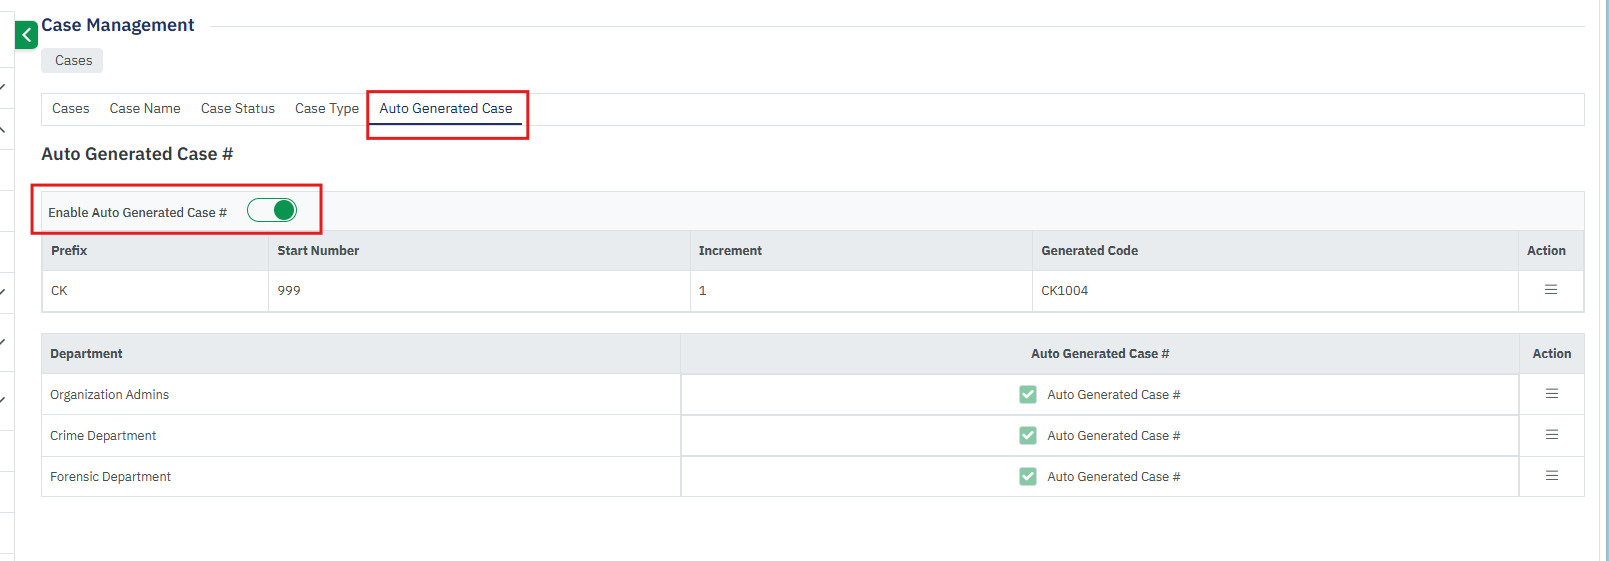
During the case creation process the case number field is a mandatory field. This case number can be auto-generated in any organization if the organization admin has enabled the auto-generated flag.
Organizations can define a default format for the case number as per the organization need.
Enable by clicking the Enable Auto Generated Case # toggle. After enabling the toggle, this can be done for individual departments.

An auto-generated number has a prefix, start number and increment number defined by the admin. With these details whenever a new case is created the prefix will always be the same as what is already defined, and the start number will be incremented based on the increment number.

Administrators can enable and disable this flag using the Action menu.

